Complete Gmass Tutorial, Including How to Install Gmass on Gmail
We've compiled a complete tutorial on how to install Gmass properly, including all of the necessary steps and screenshots.
One of the most well-liked, practical, and effective mass emailing applications for Gmail and Google Workspace is Gmass. You won’t need to learn a new platform because Gmass gives you mail merge and email marketing abilities inside your Gmail account.
In this article, we’ll lead you through each step involved in installing Gmass and launching your first email campaign with our quick start guide. We’ll also introduce you to a plethora of resources so you may learn more about the extensive selection of cold email, mail merge, and email marketing tools offered by Gmass.
The first section of this article is a guide on downloading and installing Gmass. However, if you have done this already, feel free to move to the next section.
Downloading and Installing Gmass
In order to effectively use Gmass, two things are needed; a Gmail account and a google chrome browser for your desktop. It is noteworthy that Gmass is a desktop app requiring a computer, not a mobile device.
Installing Gmass in your browser
With these few steps, you can install Gmass in your browser.
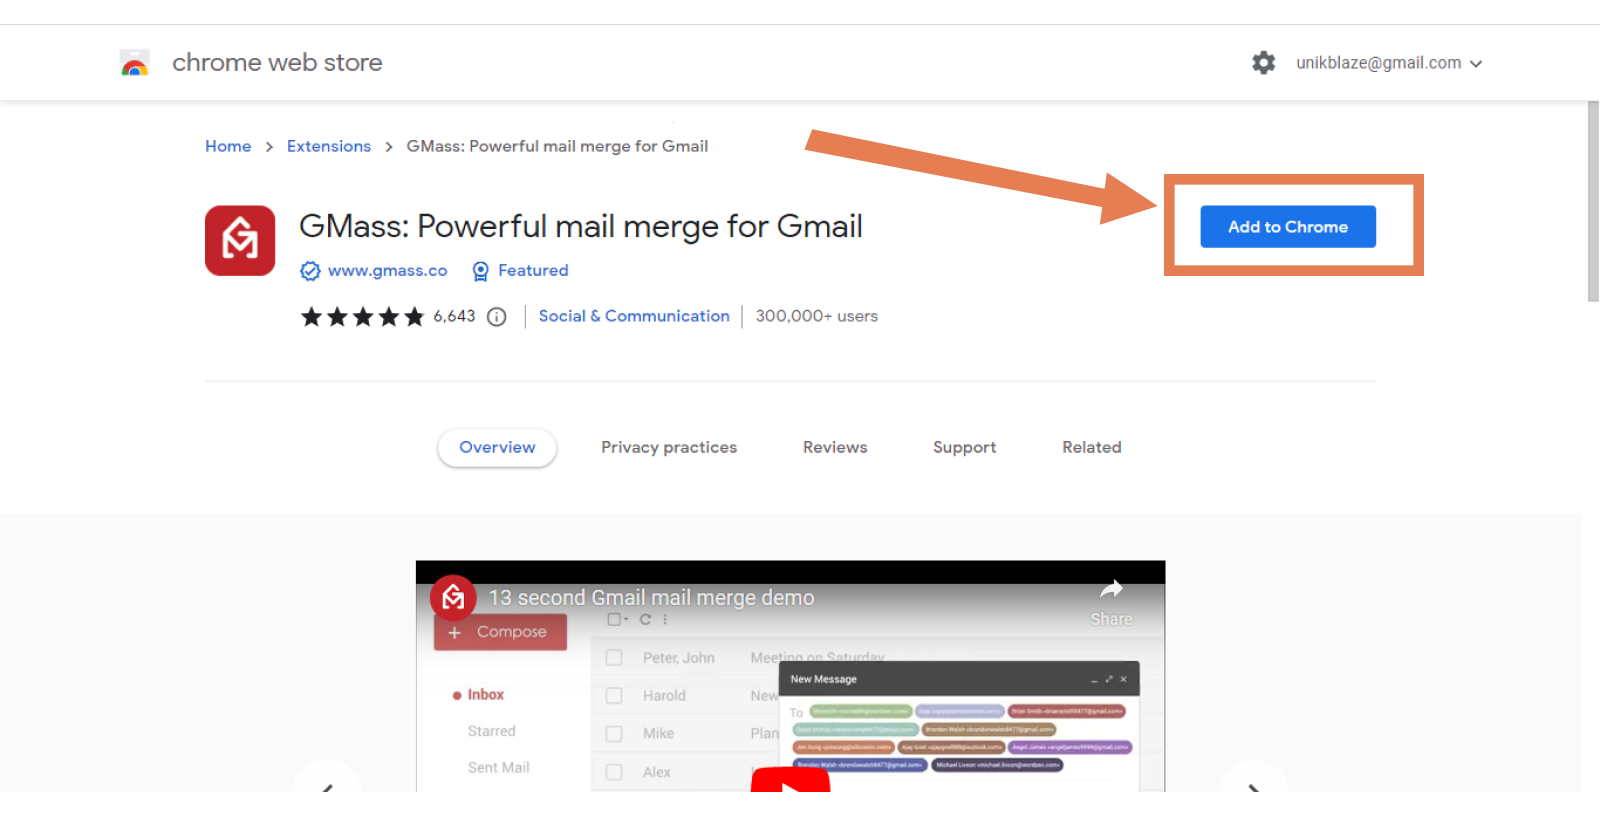
You can download the Gmass extension at the chrome web store by clicking the ‘add to chrome button’ as seen below.
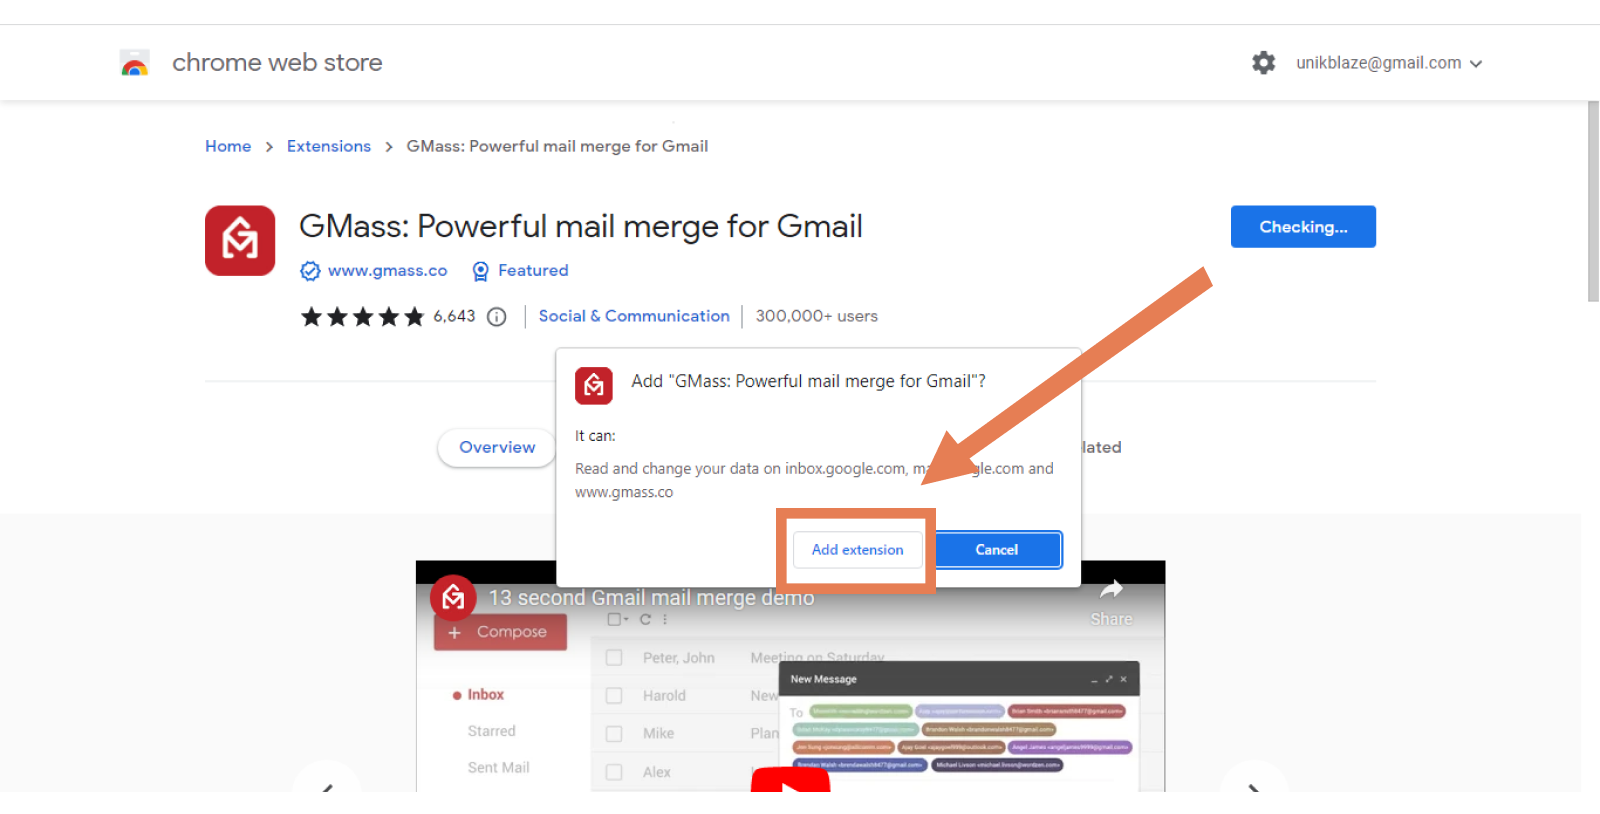
The next step is to click ‘add extensions.’ The reason for this step is to give Gmass permission in Gmail.
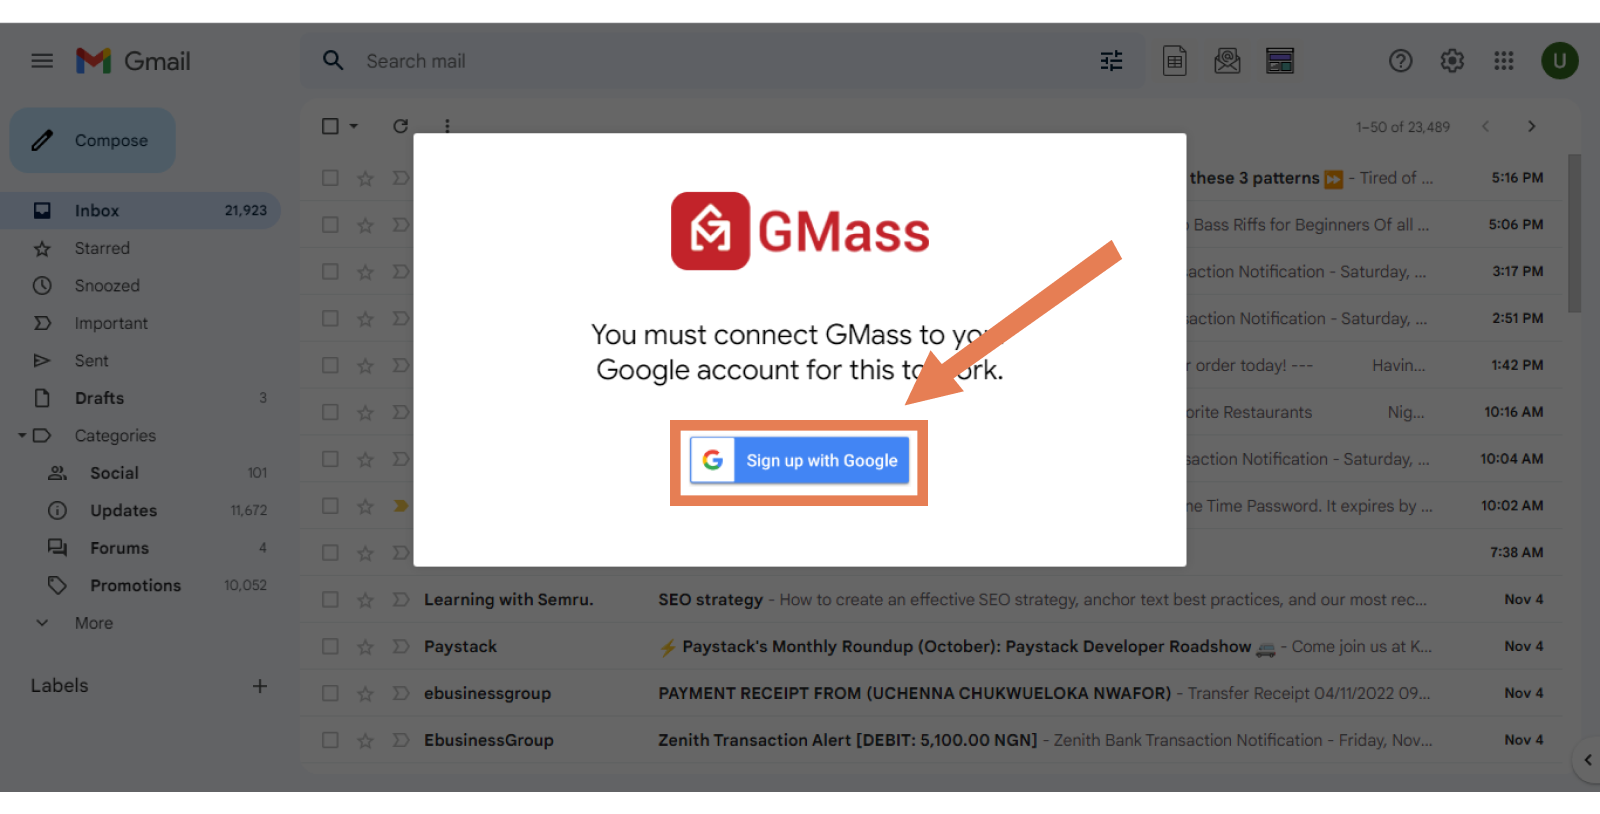
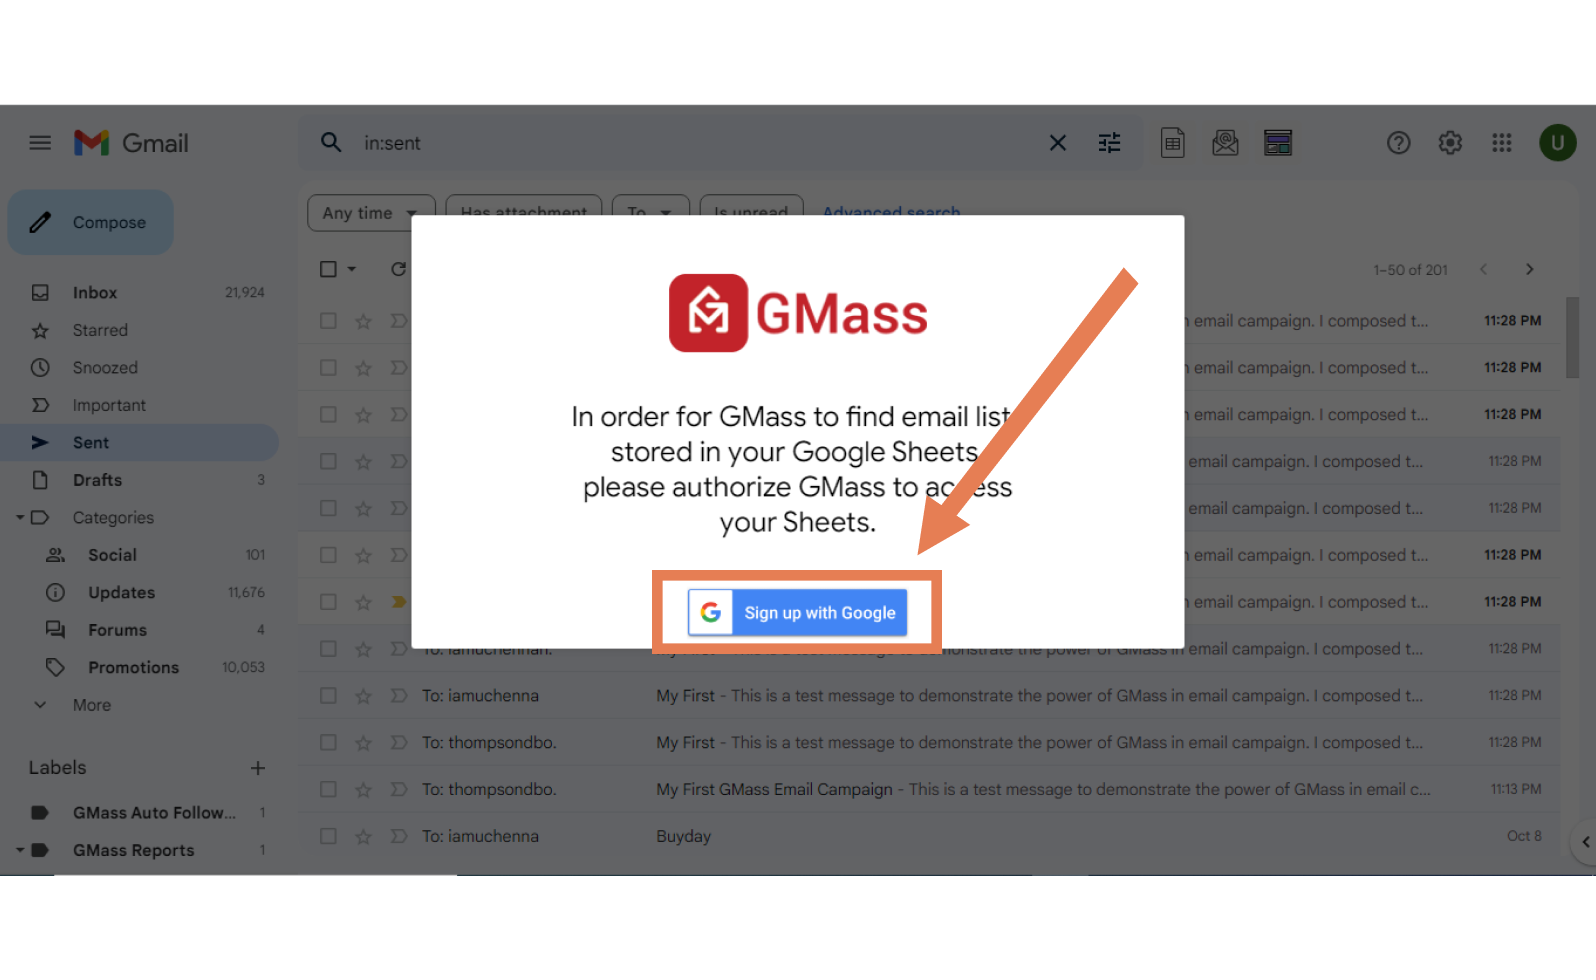
With this, you will be redirected back to your Gmail account. In your Gmail, click the ‘sign up with google’ button to officially link Gmass and your Google account.
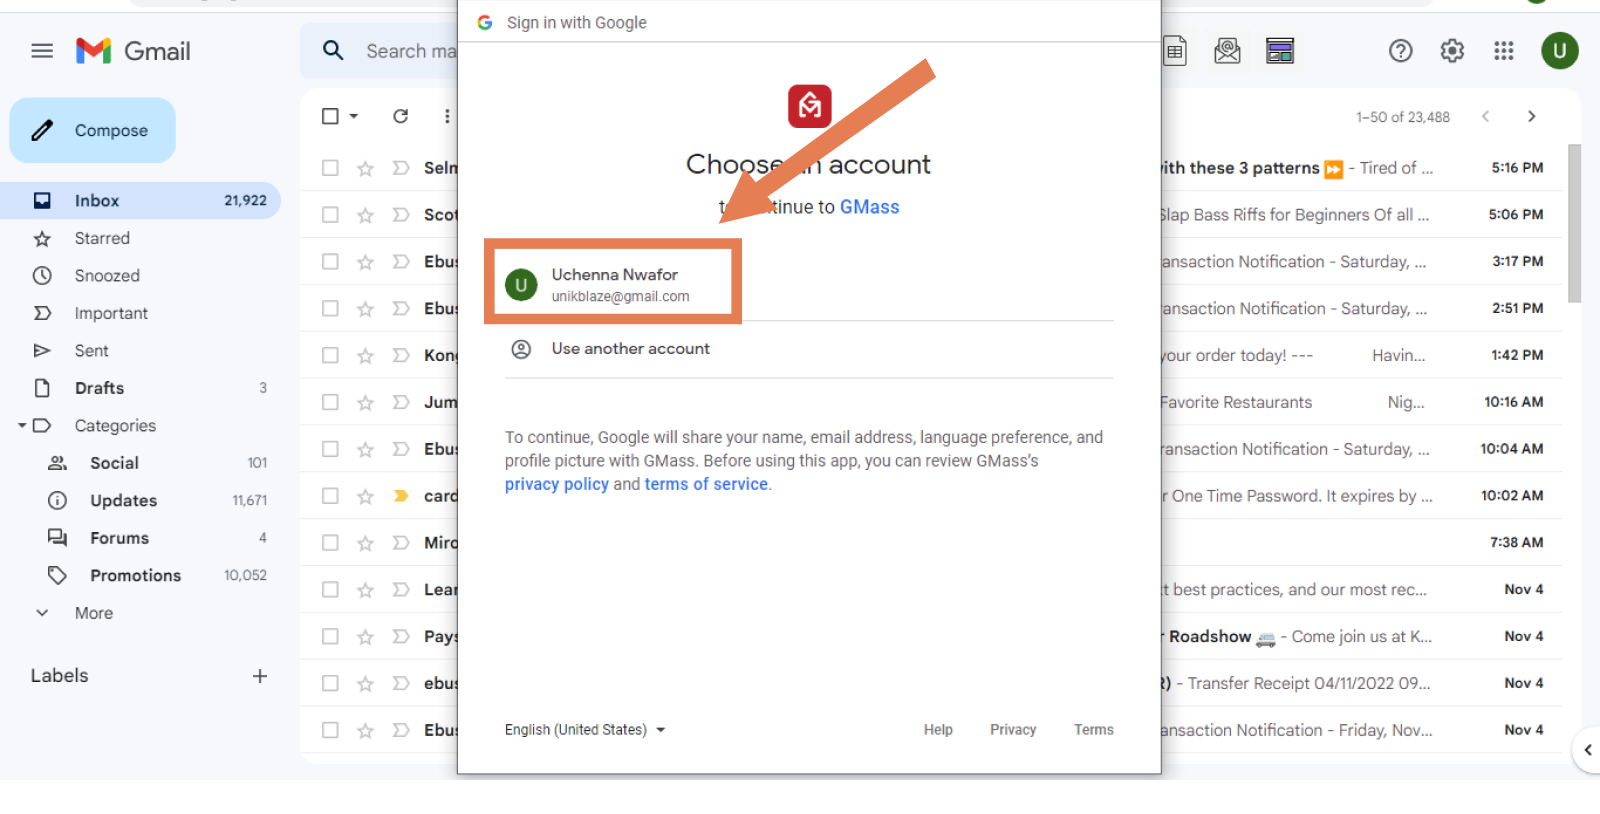
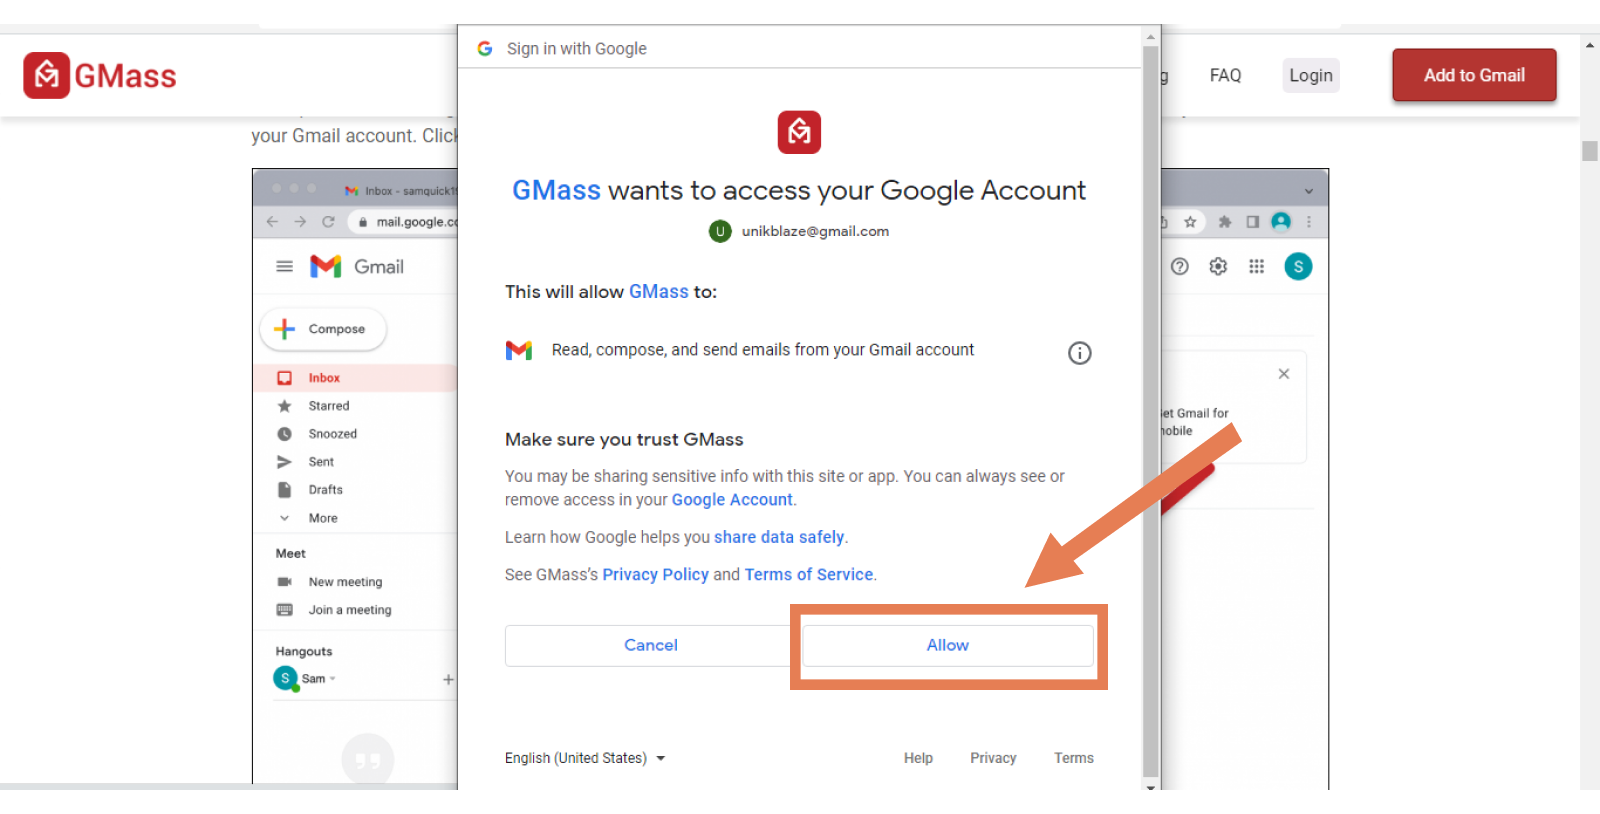
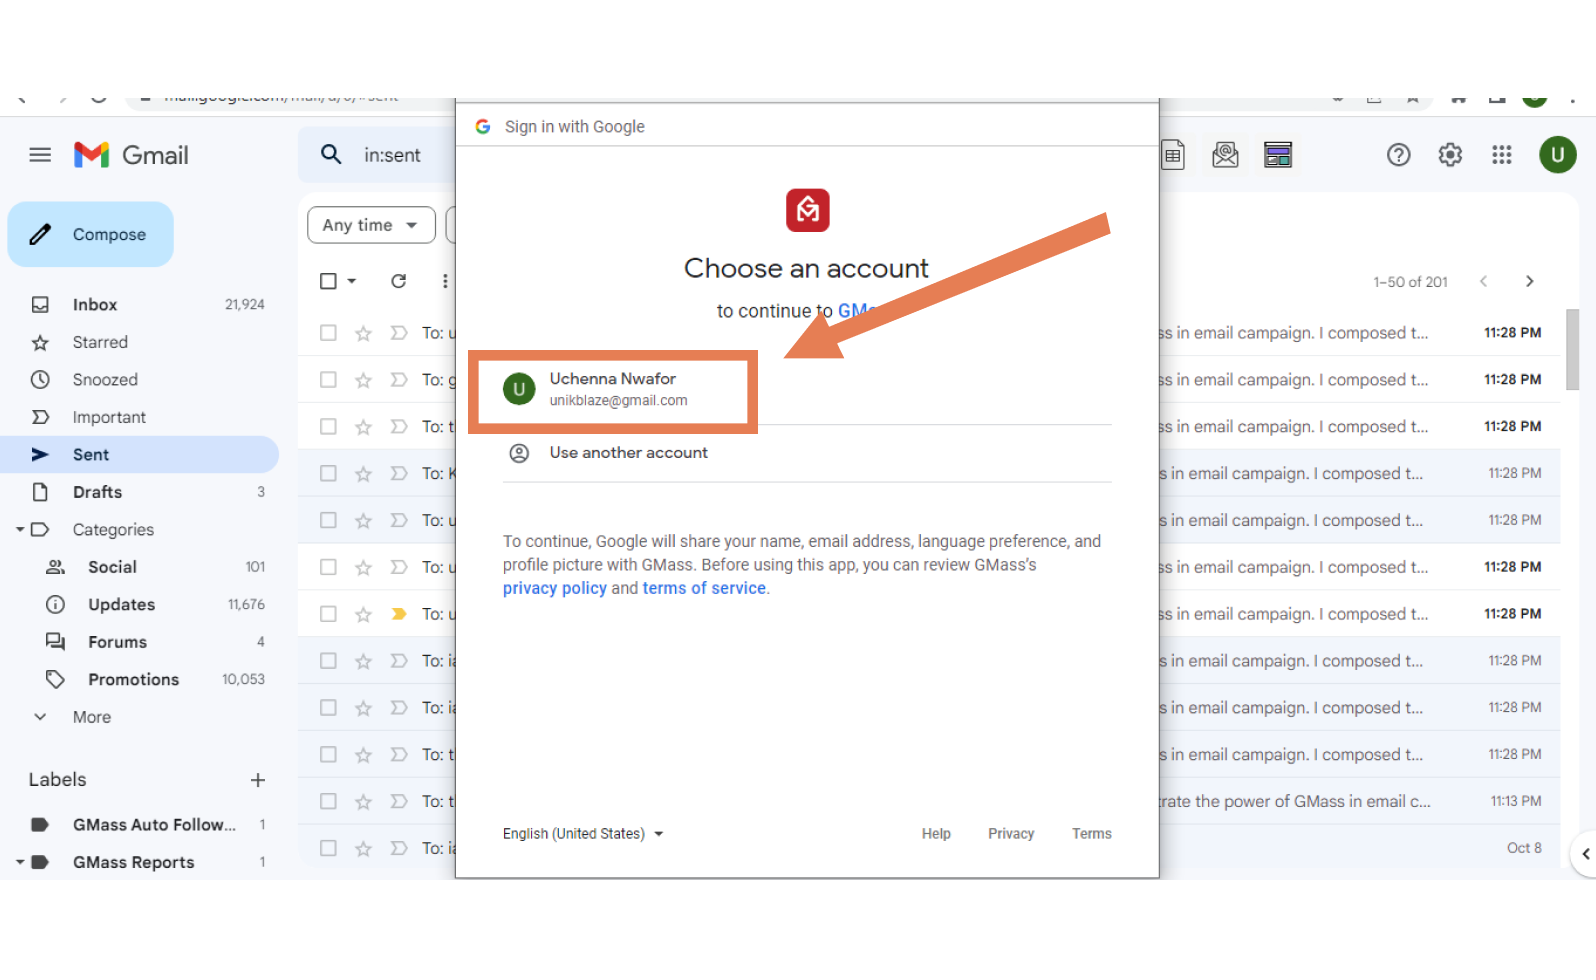
You will now have to choose which account you wish to use in the google authorization window.
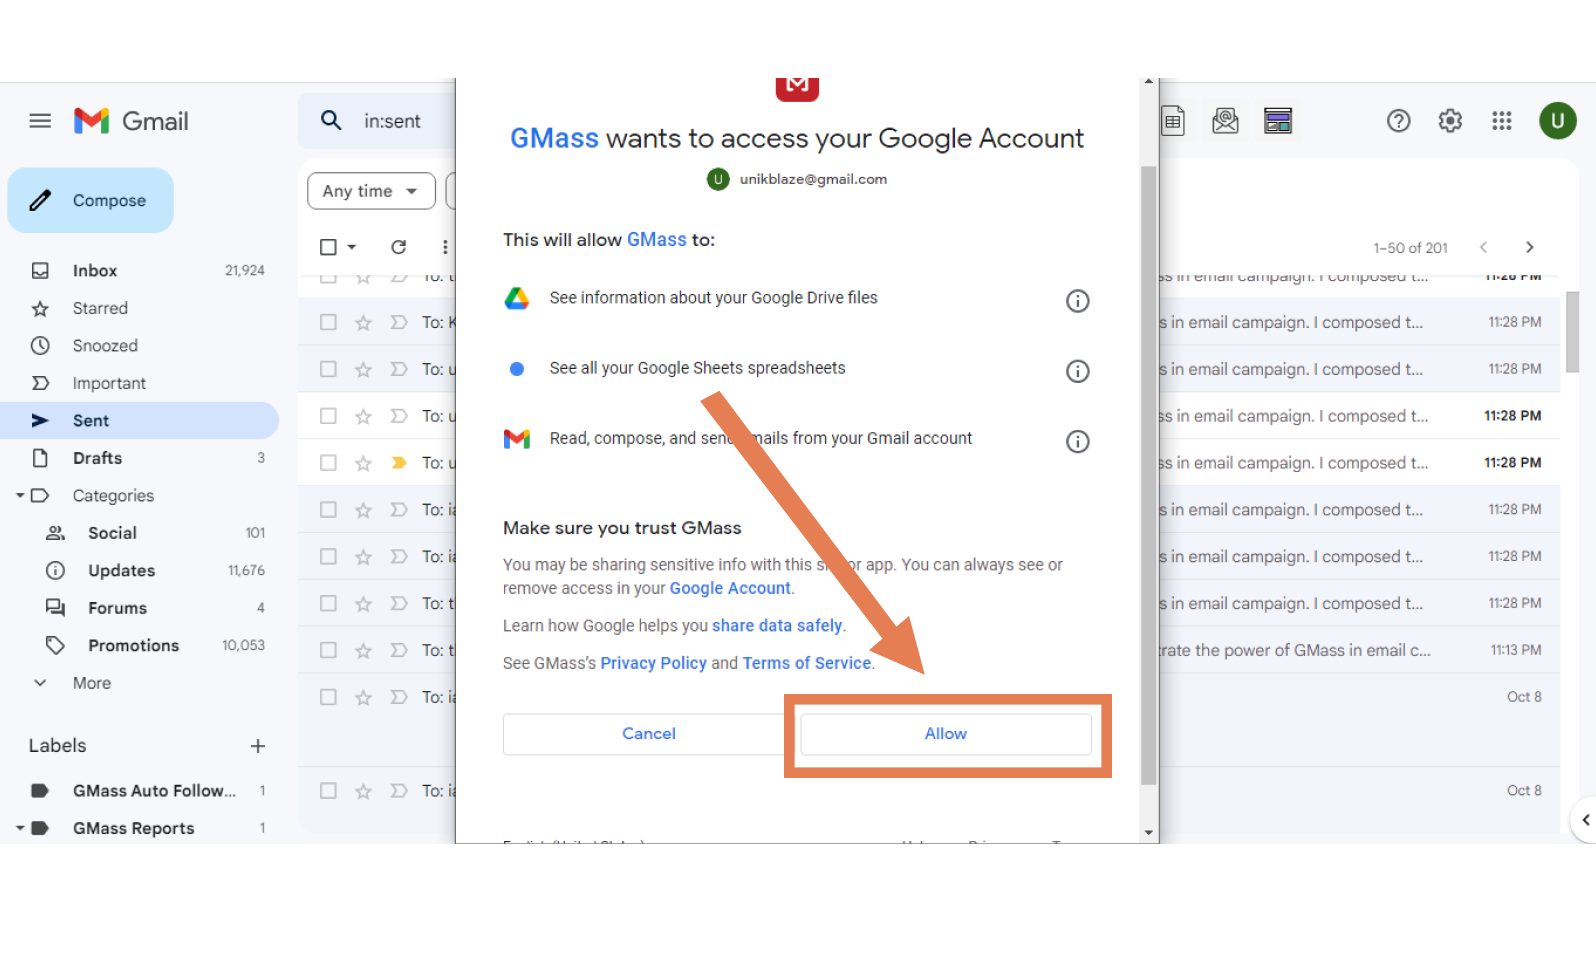
There are still more authorizations. Again, for Gmass to send your emails from your Gmail account, it must require these. To proceed, click ‘allow.’
Next, permit chrome to display notifications for Gmass so you can receive important campaign alerts. This may be challenging as it is commonplace for most people to reject any ‘accept notifications’ pop-ups. However, doing this will prove to be with it as you manage your campaigns.
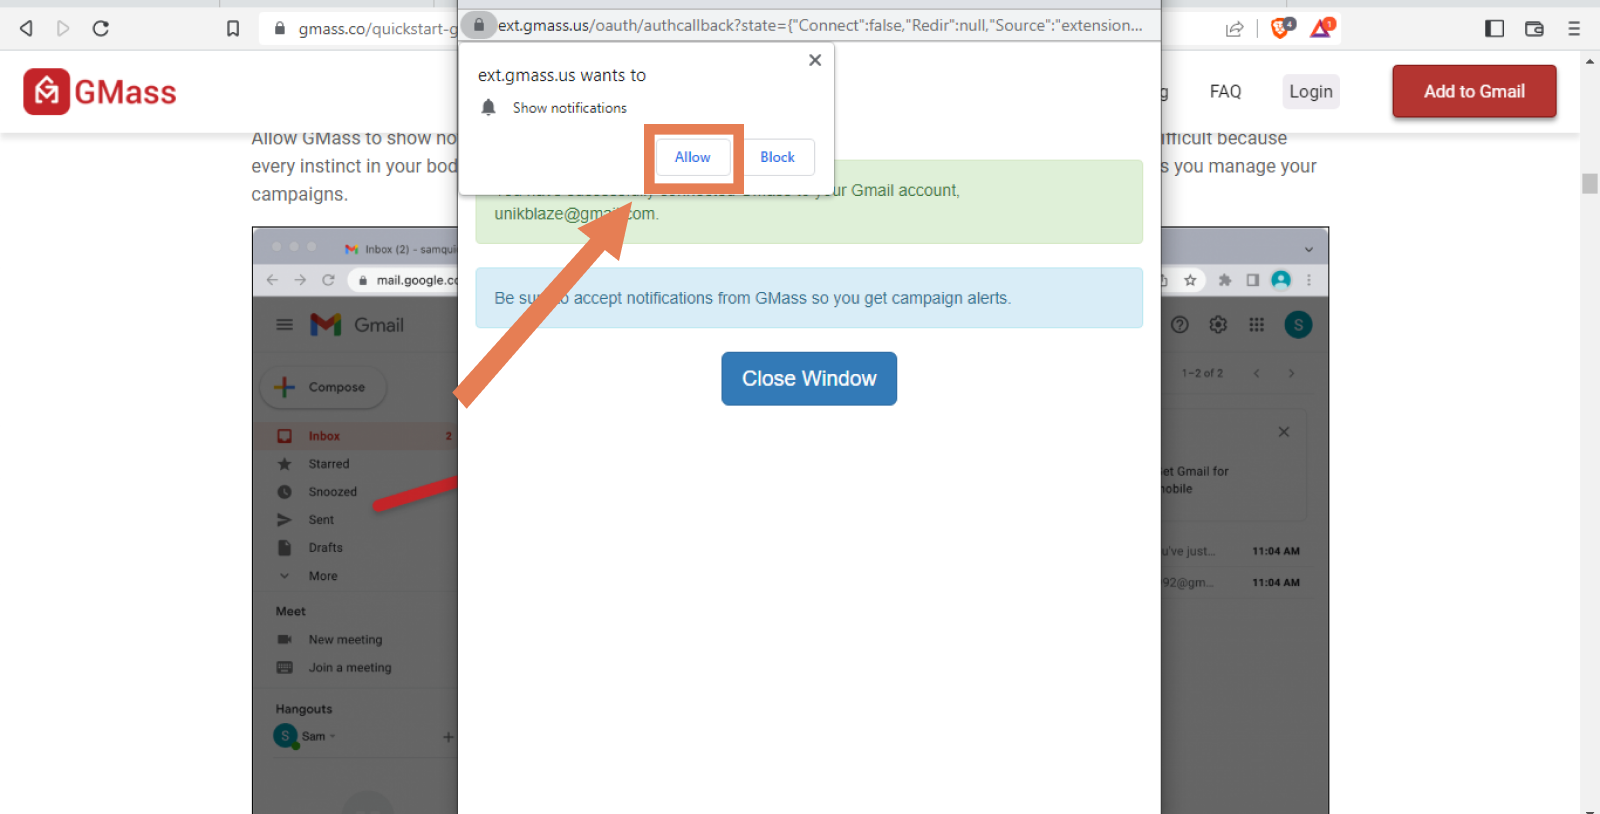
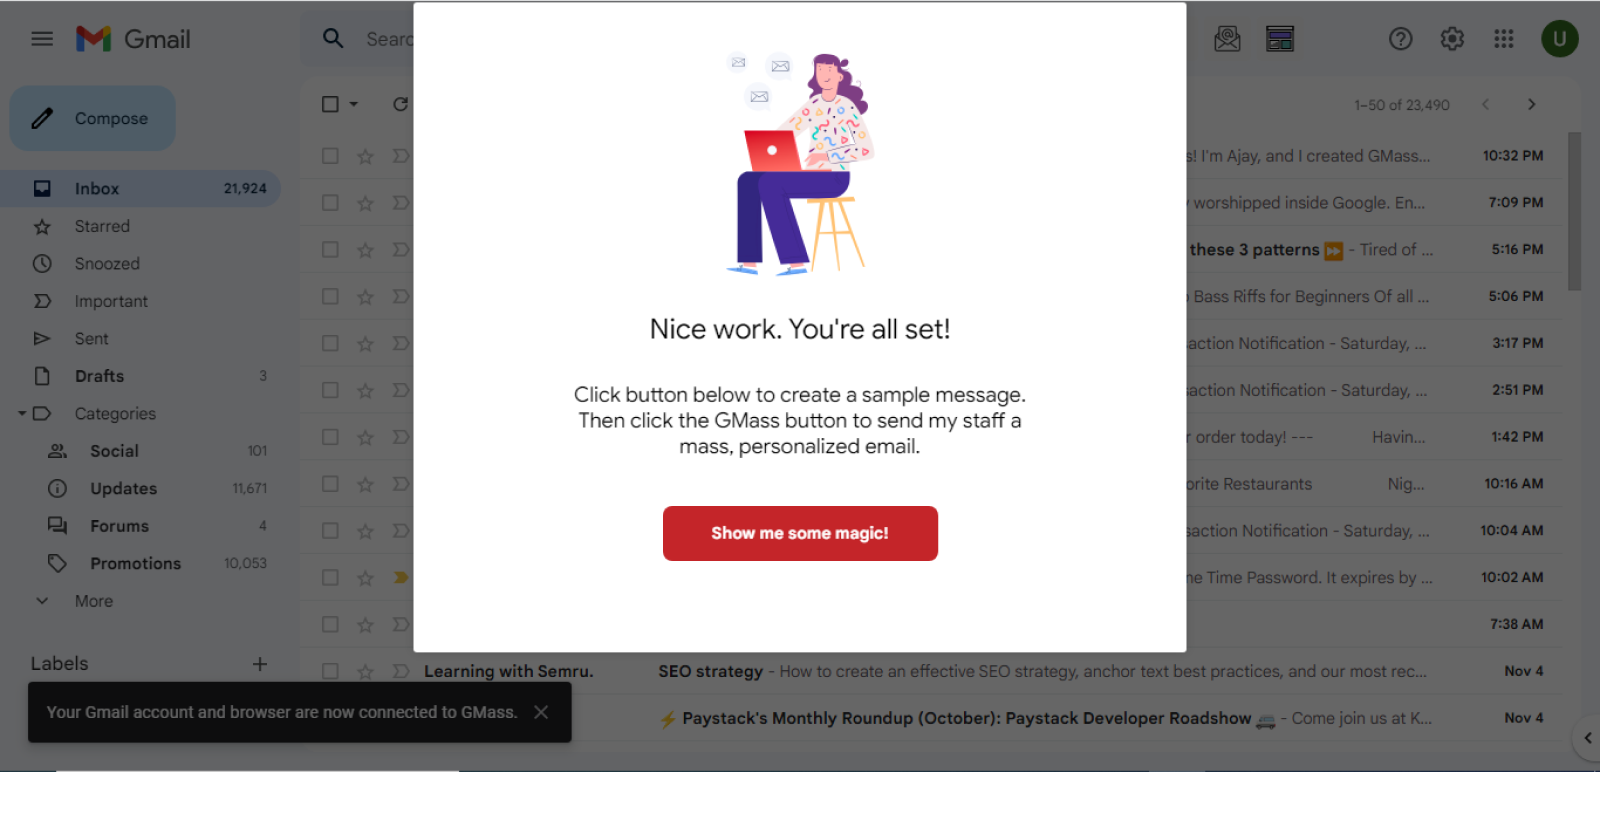
Click the ‘close window’ button. Then you’ll see the overlay of your success, as this is the final step in installing Gmass in your browser. Click the ‘show me some magic’ button to send your first test.
Sending The First Gmass Test Email
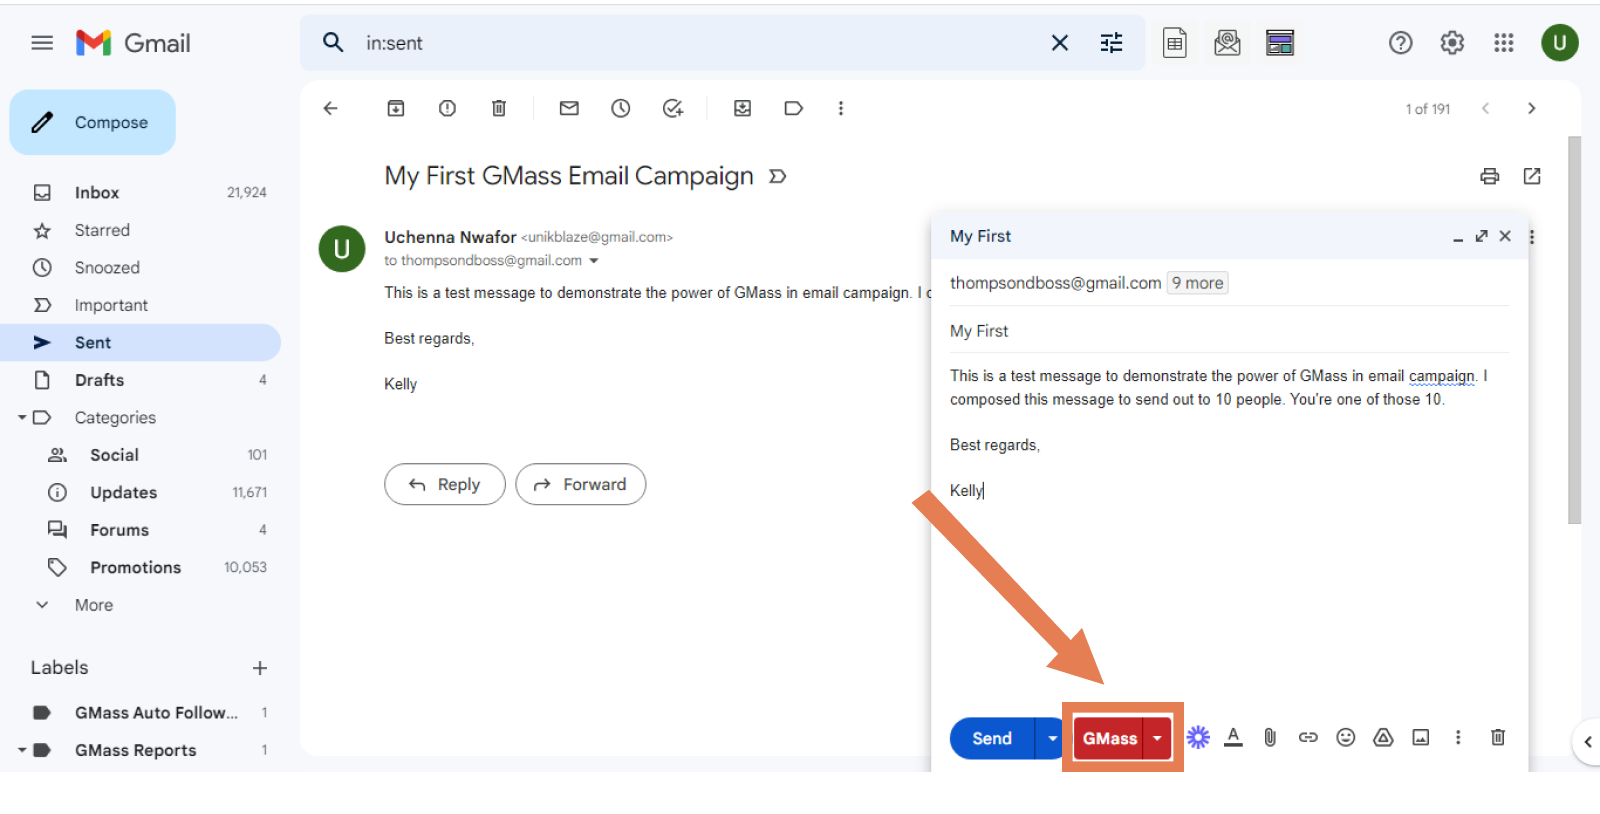
Learning how to install Gmass in Gmail isn’t enough; it is essential to learn how to use the tool. Below is a step-by-step guide on how to send your first Gmass test email. As the email in the picture below shows, your first message will be sent by clicking the Gmass button. To see what happens next, click the Gmass button.
Furthermore, Gmass will send you an email to inform you that the message has been sent successfully, as seen below.
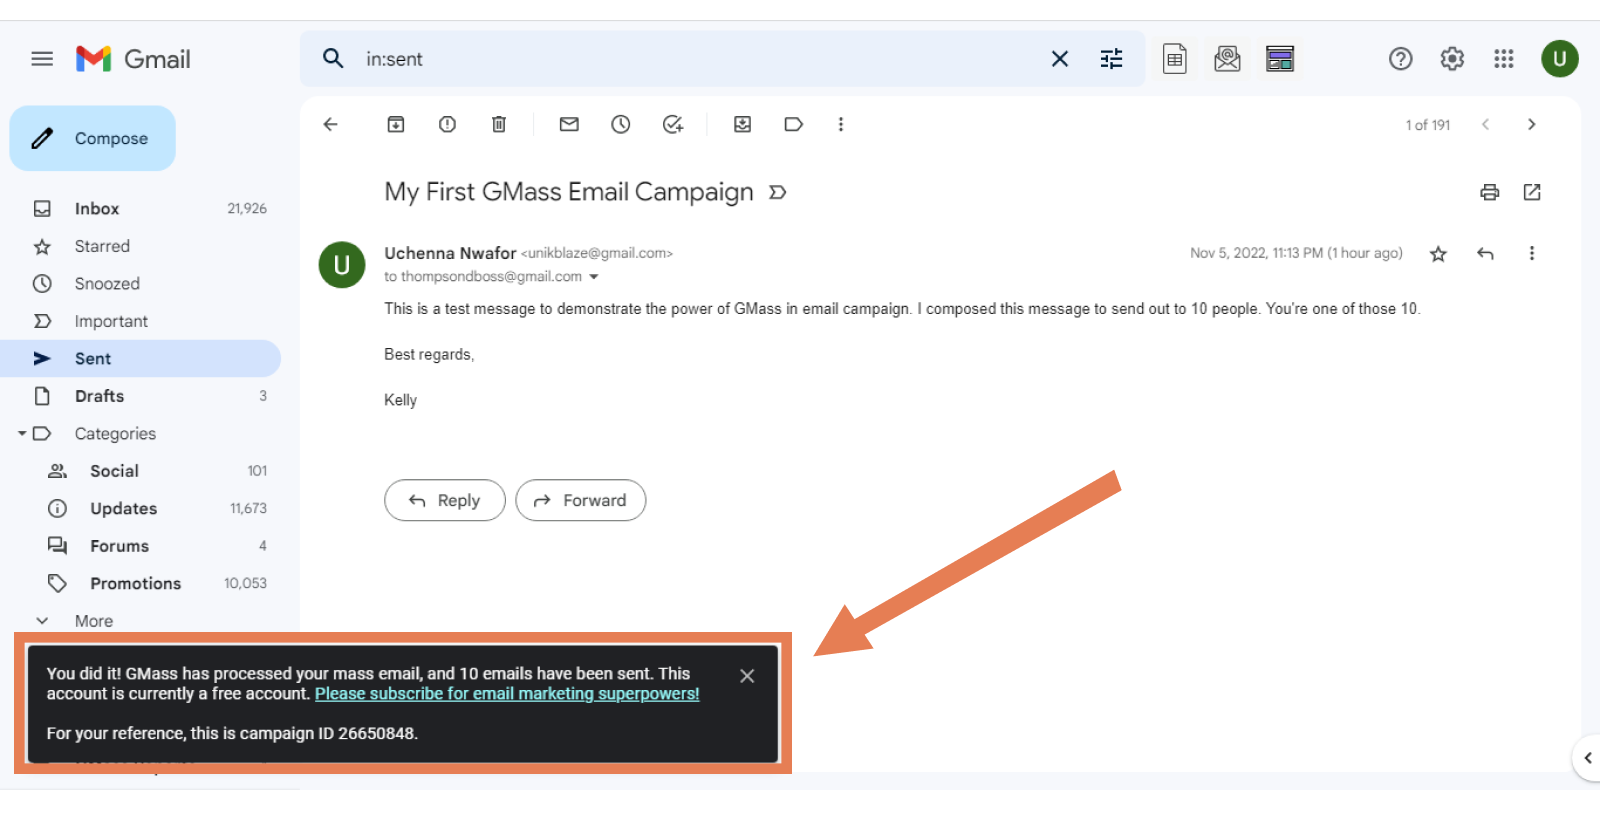
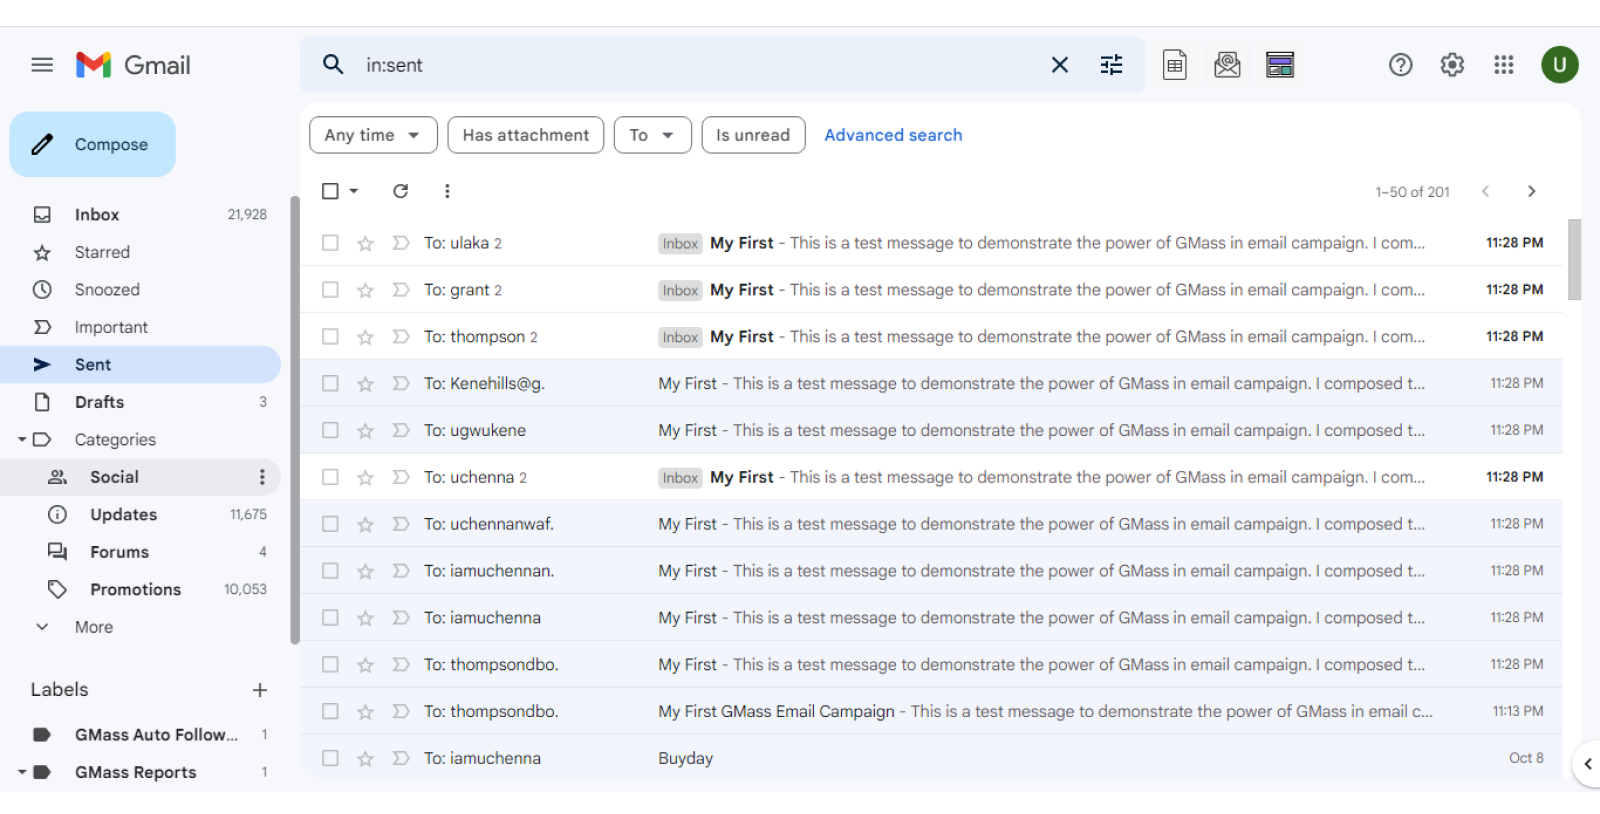
To confirm that you have sent out your emails, you can check your ‘sent’ folder in your email.
Connecting A Google Sheet To Gmass For Your First Campaign
Although there are various ways to import or connect mailing lists to Gmass, for mail merges and most campaigns you’ll send, you’ll get your lists from the google sheet. Using google sheets, however, might require another round of permissions, but it is a one-time thing. With the steps below, you will successfully connect your Gmass to a google sheet.
Step One: Prepping A Google Sheet Of Contacts
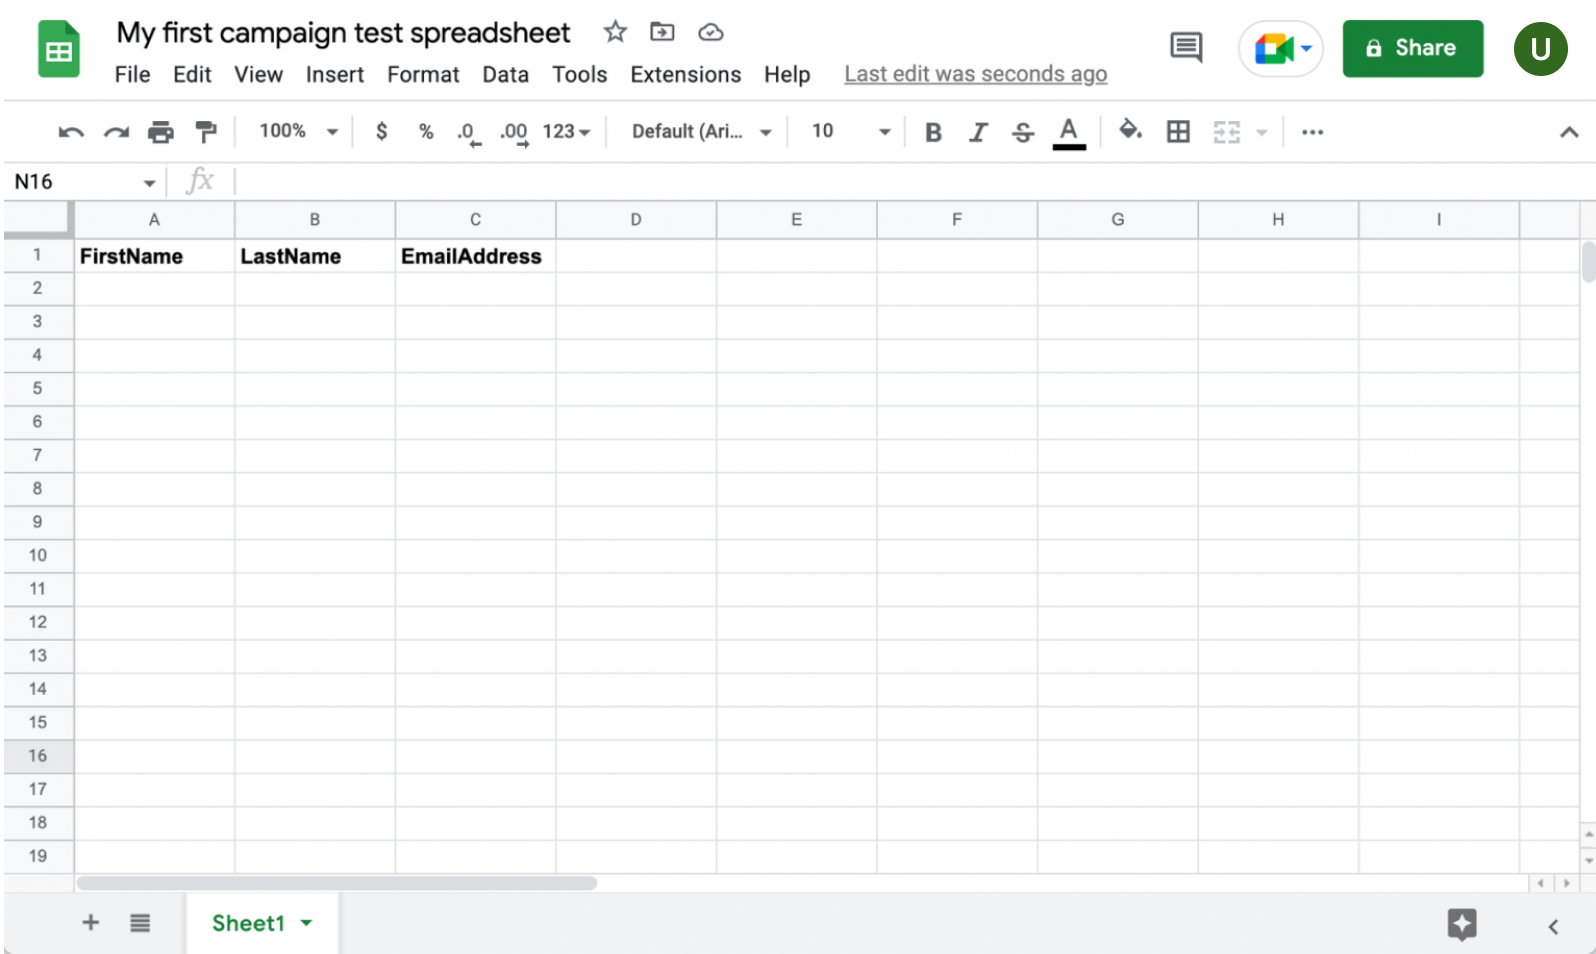
The first step involved is creating a new spreadsheet. In this spreadsheet, divide it into as many columns as you'd like to use, depending on your format. For example, in the picture below, there are three columns; first name, last name, and email address.
Step Two: Granting Gmass Google Sheets Permission
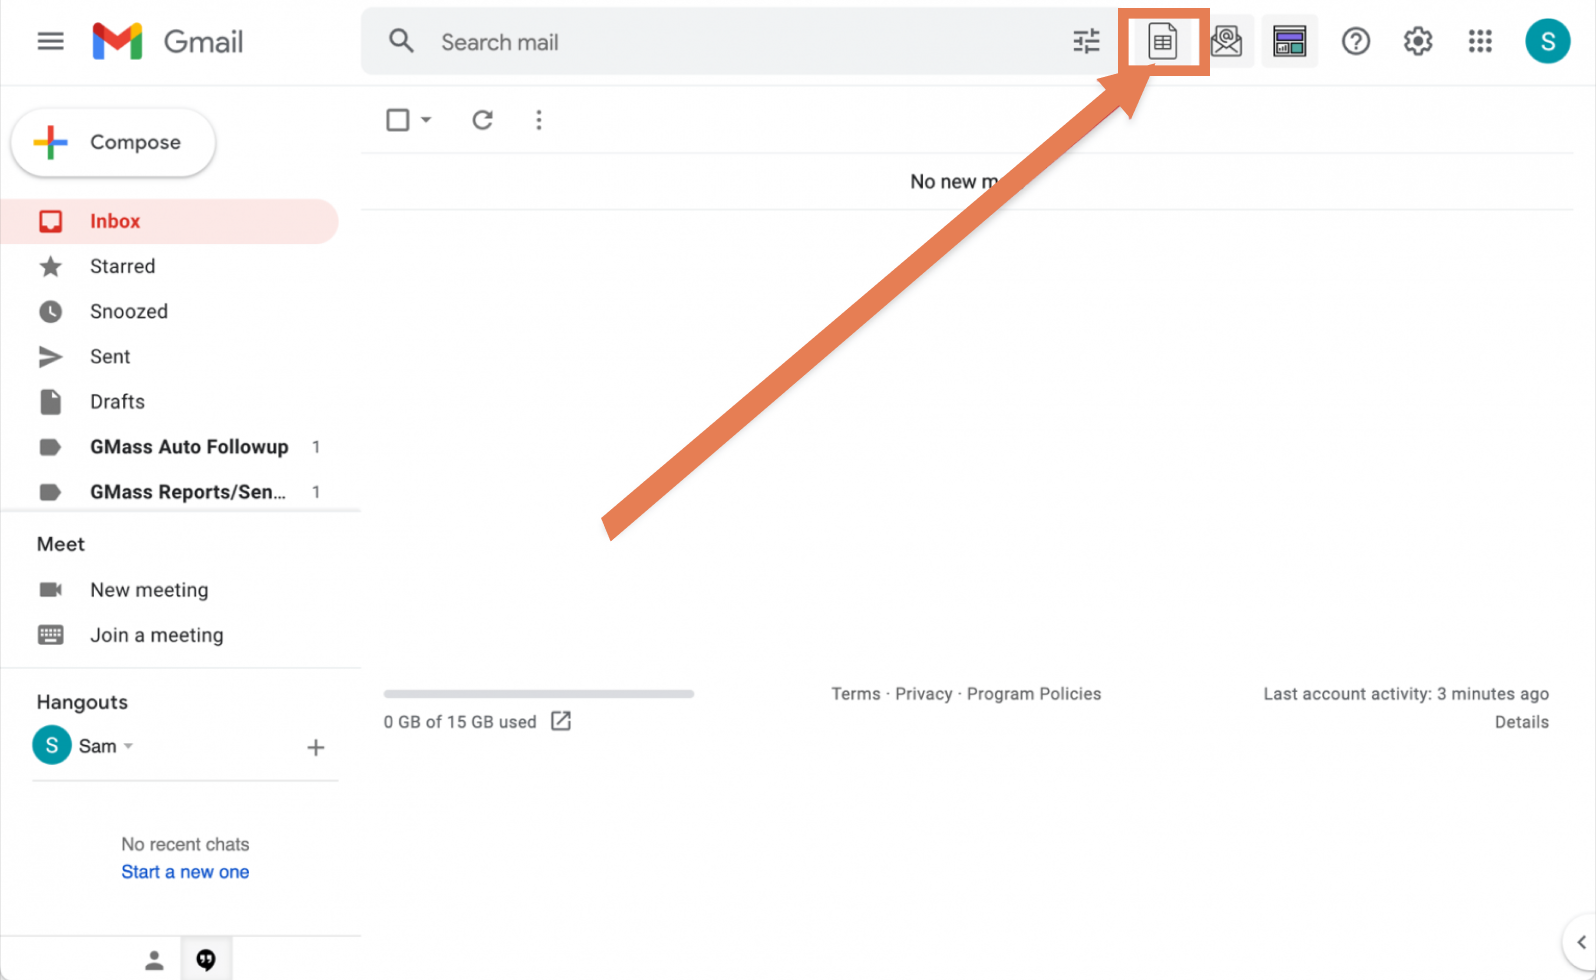
The next step is for you to head back to your Gmail and grant access. Click on the google sheets bar close to the Gmail search bar.
However, since it is your first time, you’ll need to grant Gmass permission to access Google sheets. Click ‘sign up with google.’
Next, choose which of your google accounts you’d want to authorize for this campaign.
To grant Gmass permission to access your files and spreadsheet on google drive, click ‘allow.’
Step Three: Connecting Gmass To Your Google Sheets
To connect to your google sheets, go back to your email and click on the google sheets button again.
From the drop-down in the pop-up window, choose your google sheet for this campaign. After choosing your google sheet, click on the ‘connect to spreadsheet’ button.
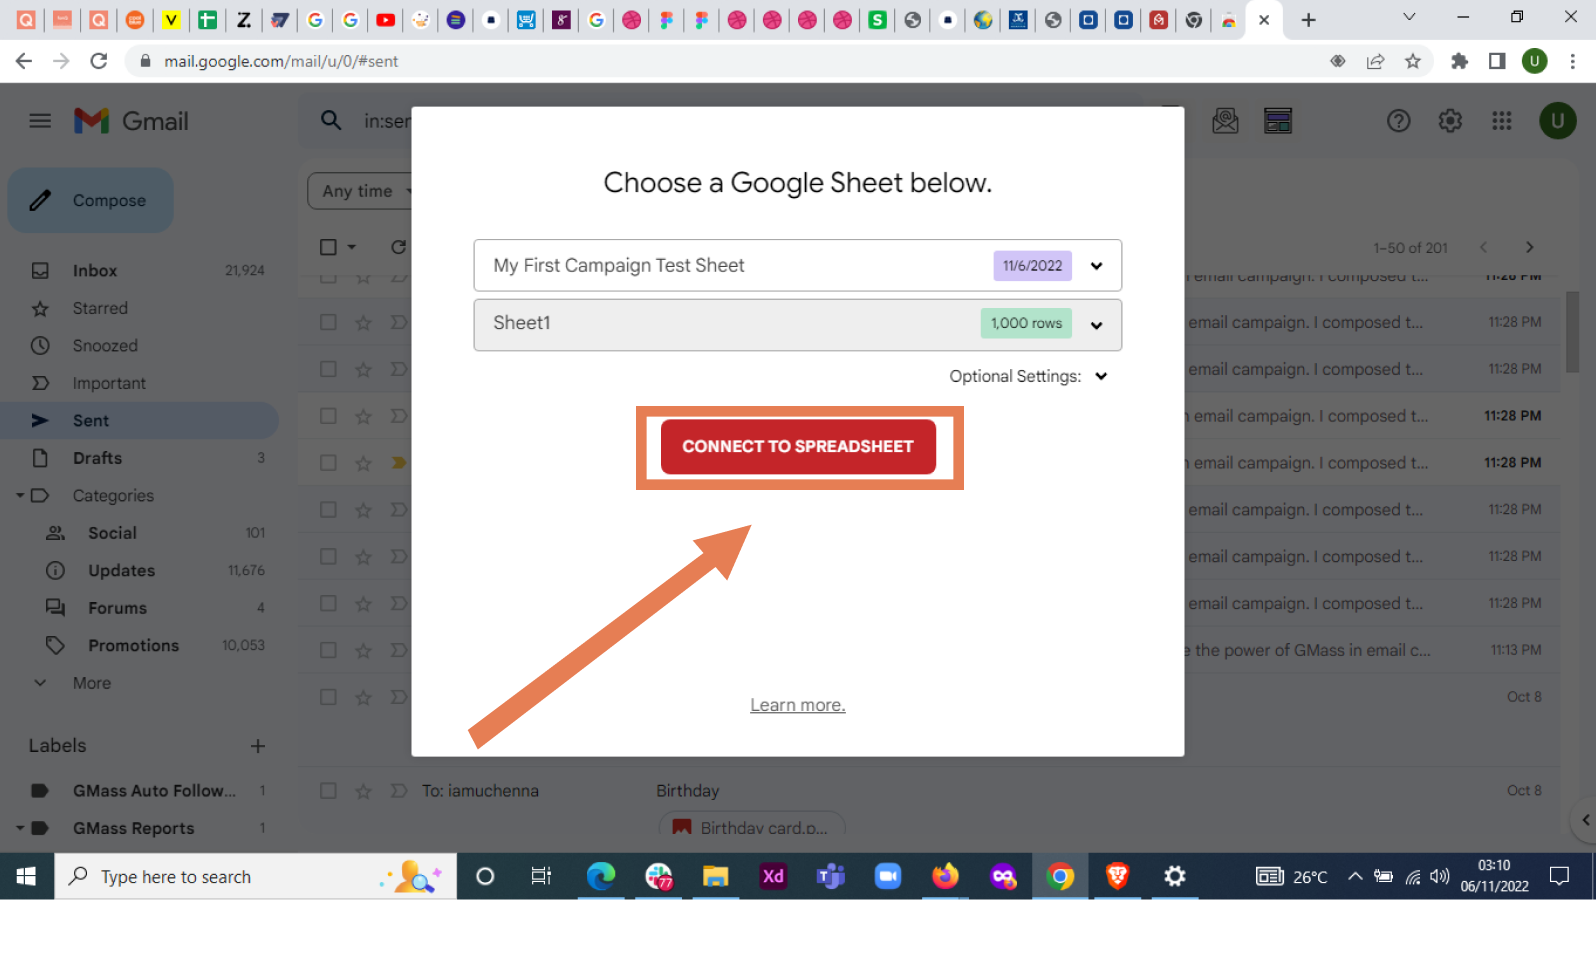
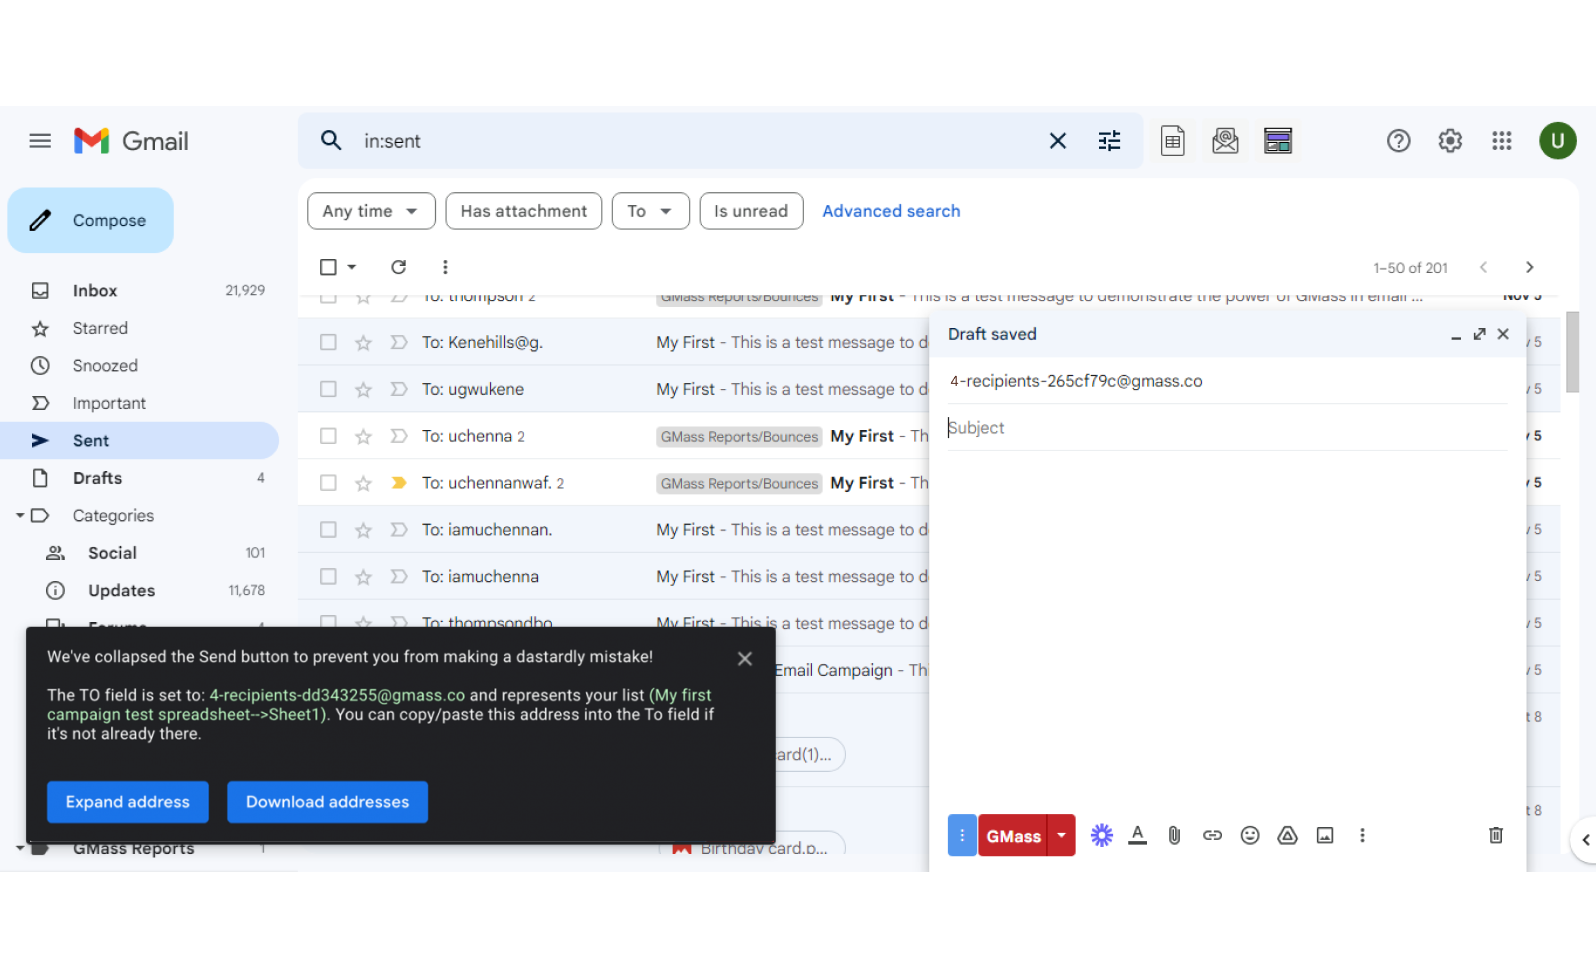
The alert in the picture below shows that Gmass consolidates all of the emails from your google sheet into a single alias email address. Additionally, Gmass conceals the standard Gmail send button to prevent unintended email sending.
With these few steps, you would not only have installed Gmass in Gmail, but also connected a google sheet to your Gmass.
Composing Your First Email Campaign In Gmass
After learning how to connect your google sheets to Gmass, you can then compose your first mass email campaign. One good perk of Gmass is that it works perfectly well in Gmail; hence composing your mass email is similar to writing regular emails.
Adding Mail Merge Personalization
Gmass allows you almost entirely to customize every aspect of your email. We'll utilize the simplest mail merge personalization possible for this quick start guide, including a first name.
Navigate to the place in your email where you wish to include a person's first name, and write a left-curly brace after that. Your google sheet's column names will now be listed in a list as your mail merge fields.
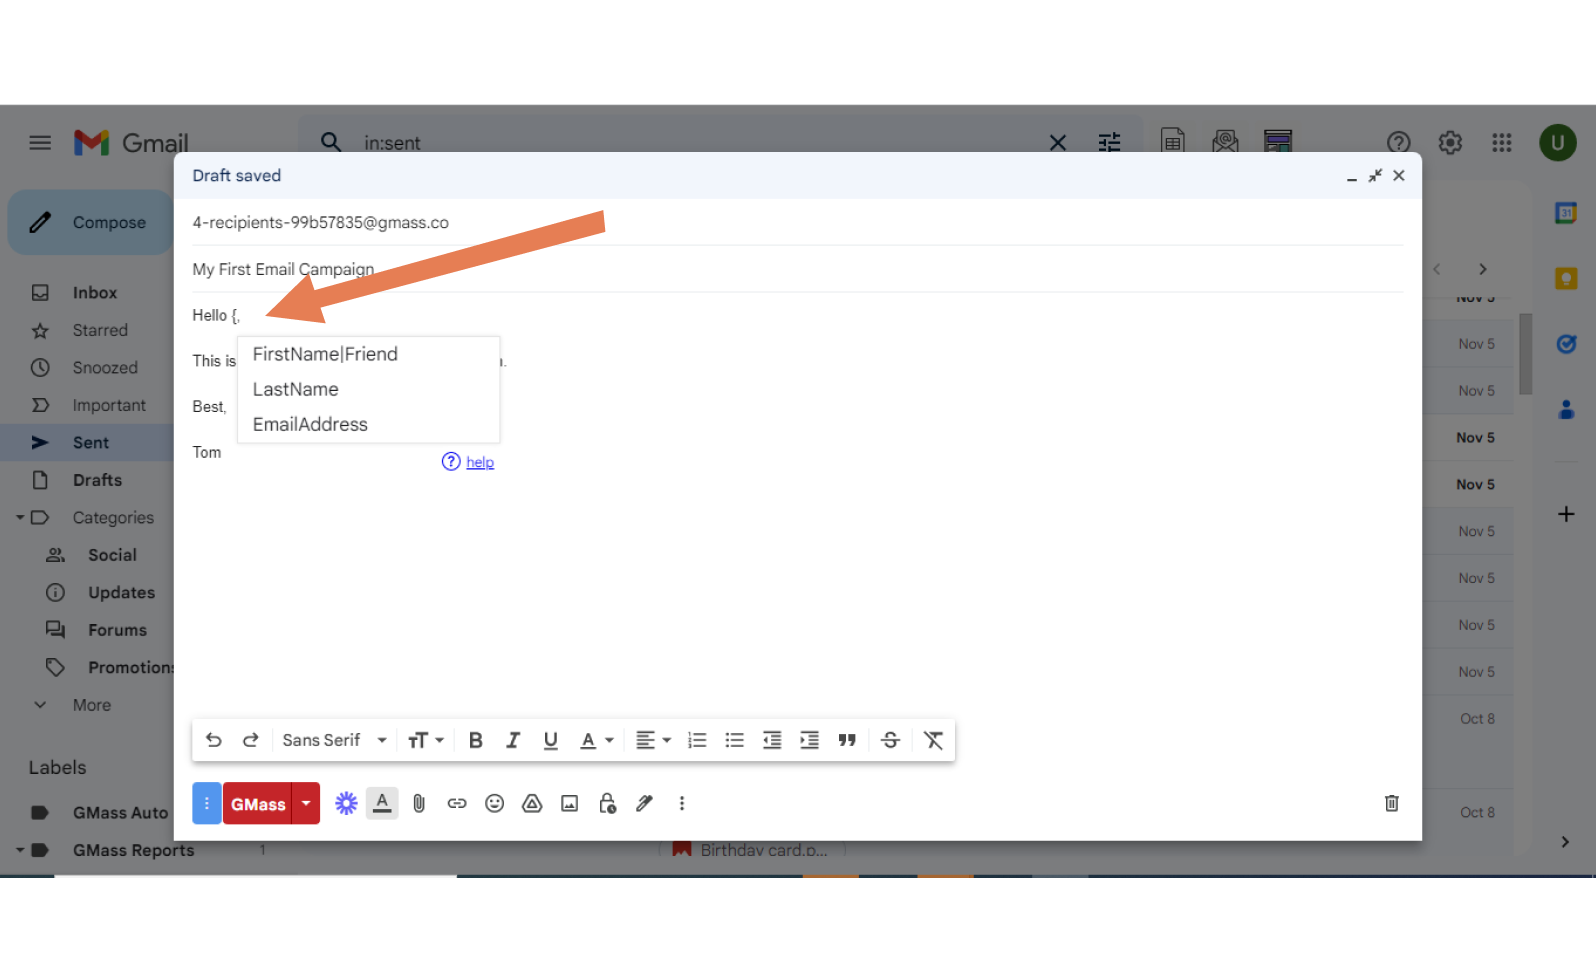
The next step is to choose the first name field. Each recipient's first name will be filled in when you click the Gmass button to send this email.

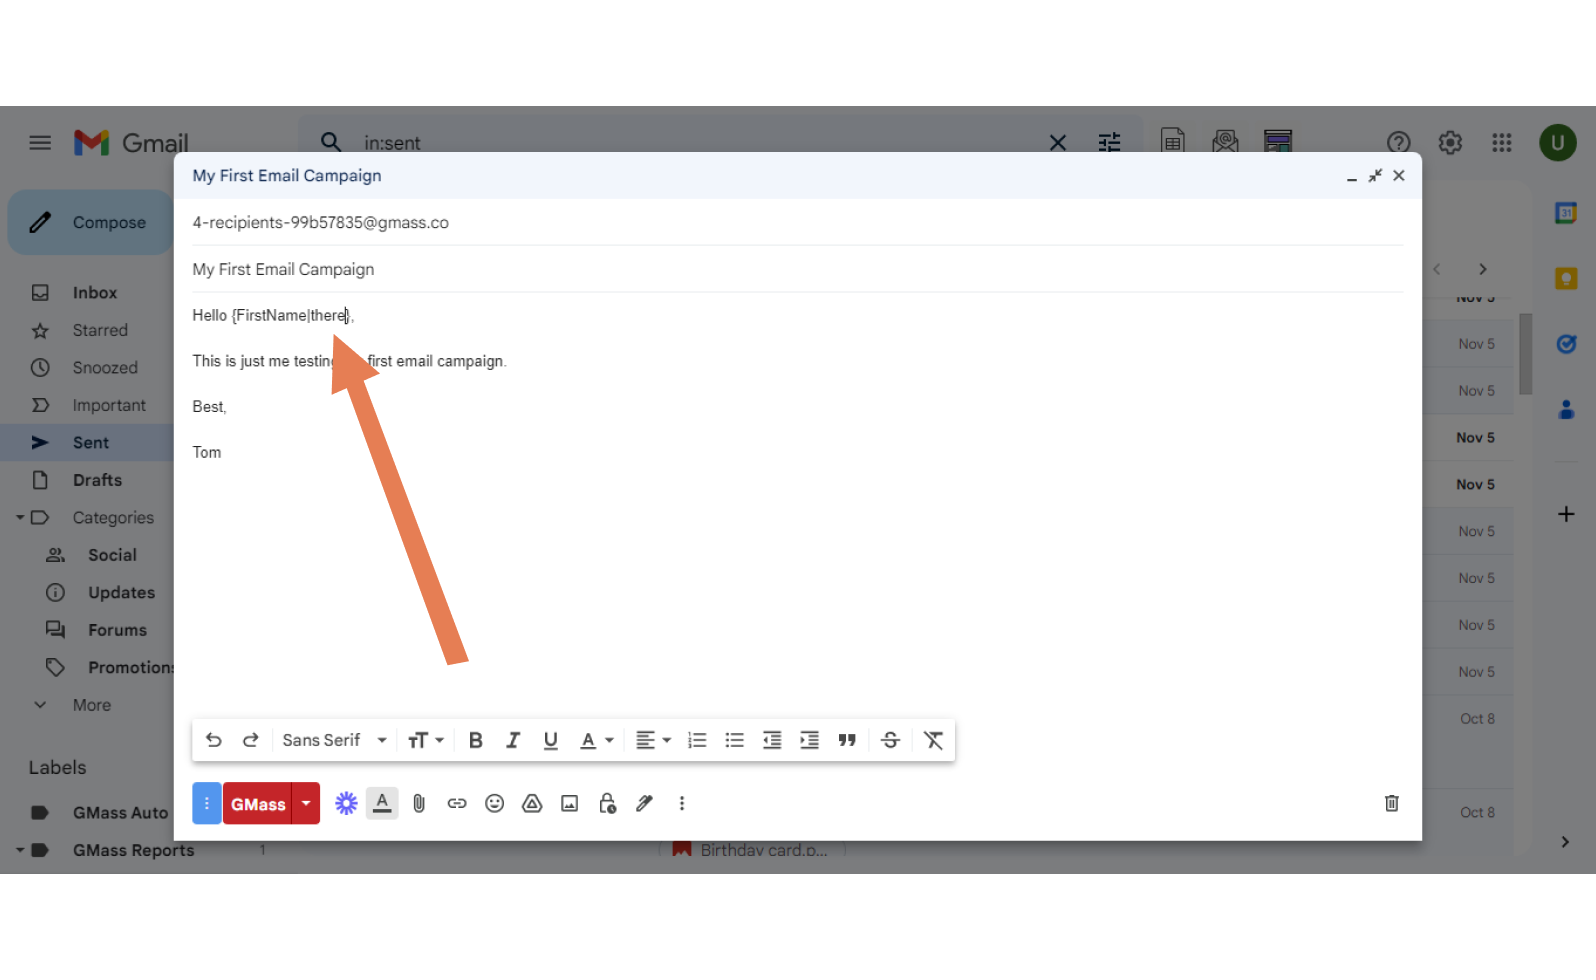
However, what if only some first names on your google sheet are filled in? If the field in your sheet is blank, you can enter a fallback value here, and Gmass will insert that value. After the merging field, add a pipe, then type your fallback to add a fallback.
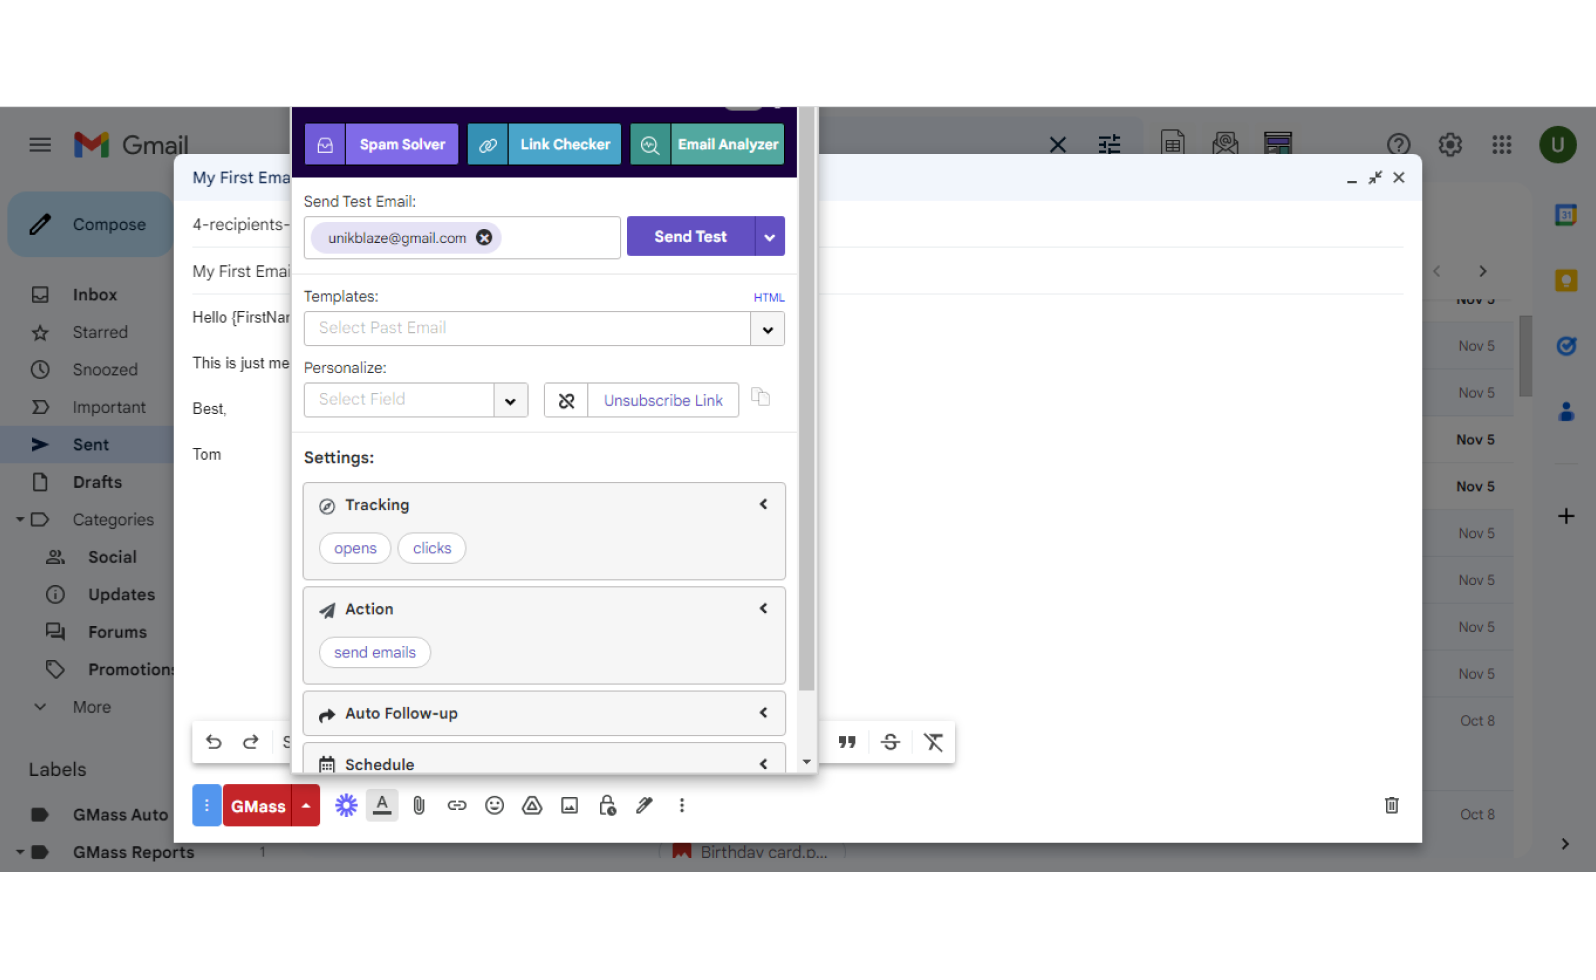
Checking The Gmass Settings
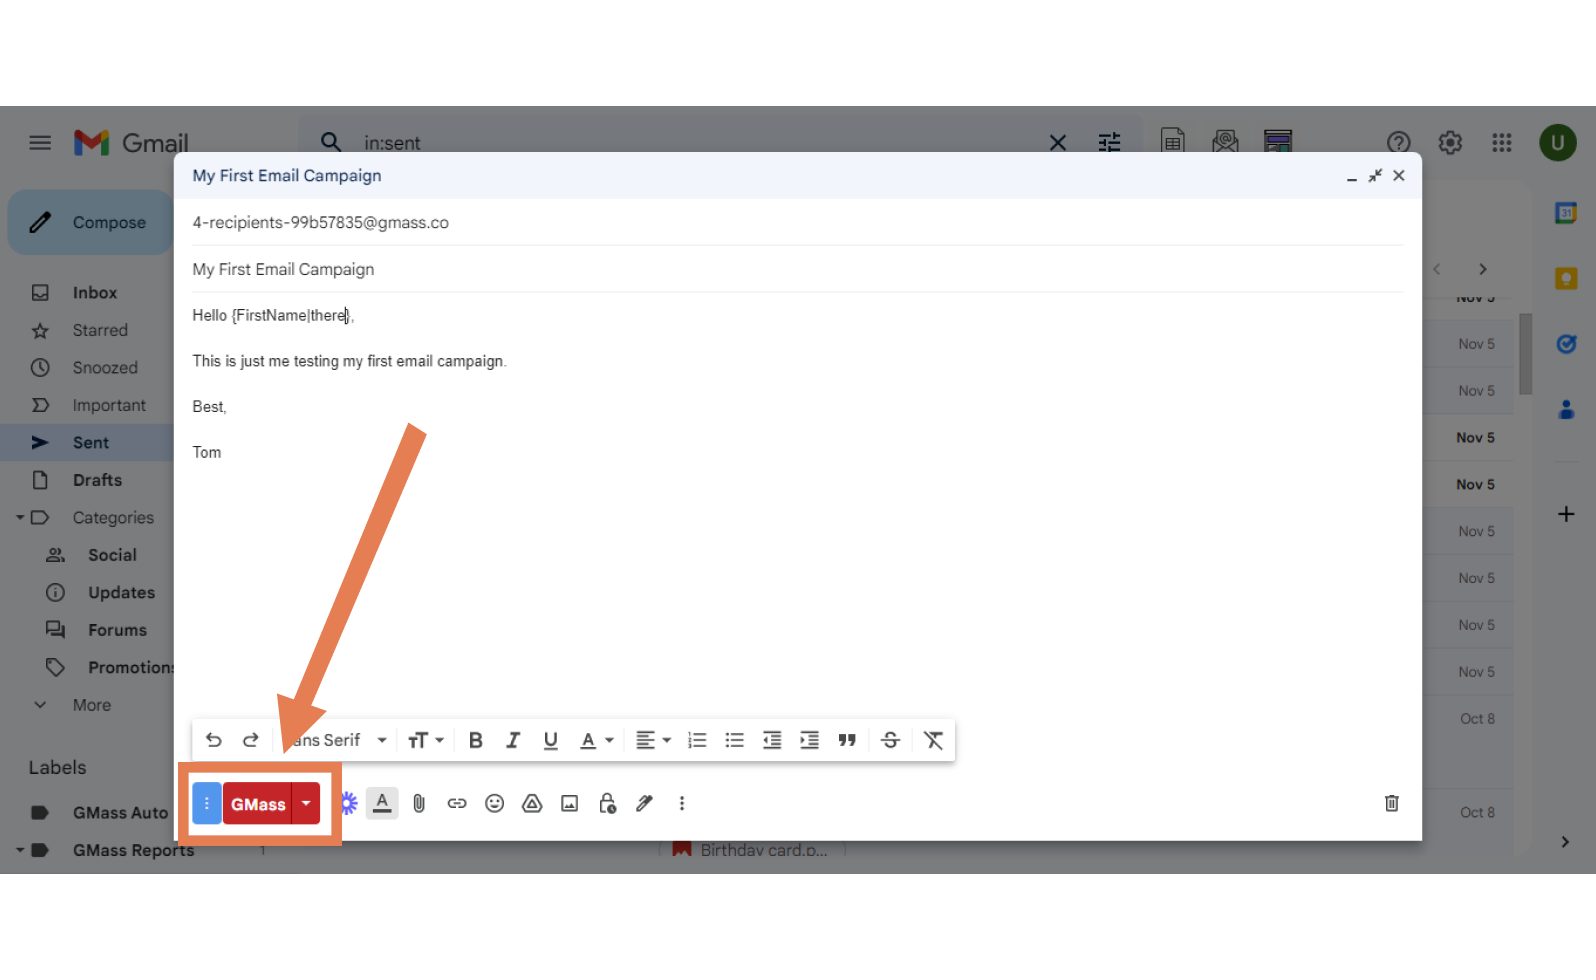
Now that your email is set, it is important to review the Gmass setting properly before you send it. To check these settings, click the arrow beside the Gmass button as seen below.
There are so many ways to tweak your email campaign here in the settings.
Sending Your First Campaign In Gmass
When you have successfully installed Gmass in Gmail, connected to a spreadsheet, and composed an email campaign, the final step is to send your campaign. This step is just as easy as clicking the Gmass button.
However, it is commonplace to check your campaign stats, especially during your first time.
Checking Your Gmail Campaign Statistics
You can check your campaign statistics in two simple ways. One easy way is to click on the dashboard icon next to the Gmail search box.
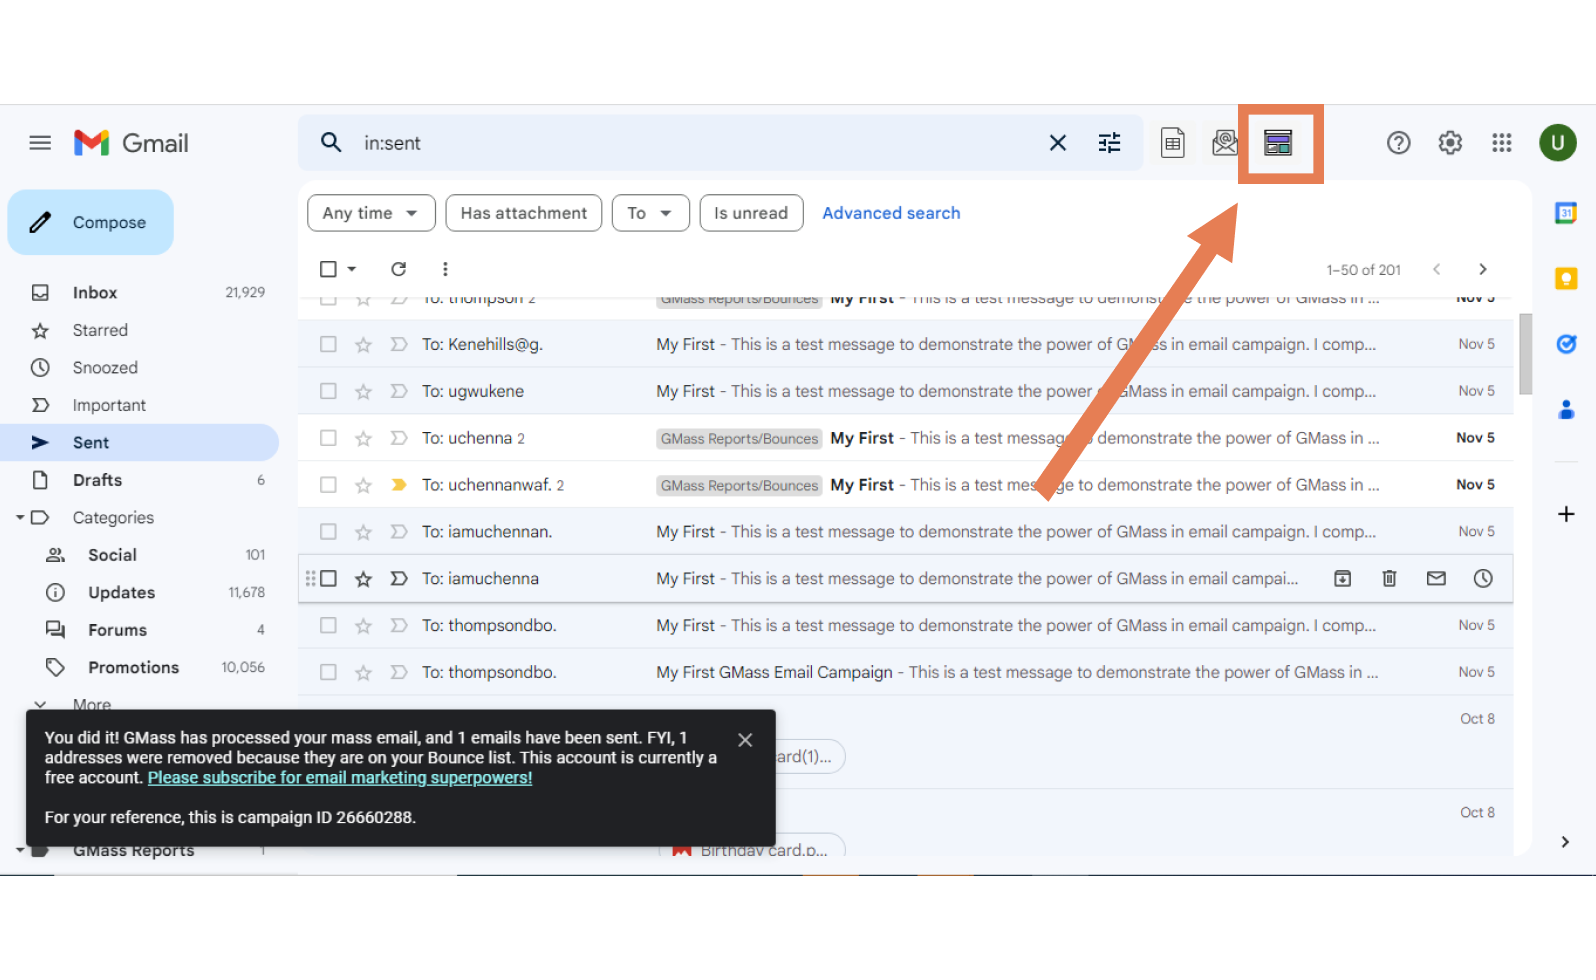
Your Gmass dashboard will then open, displaying your campaigns. Here, you can quickly view a summary of your campaign’s statistics.
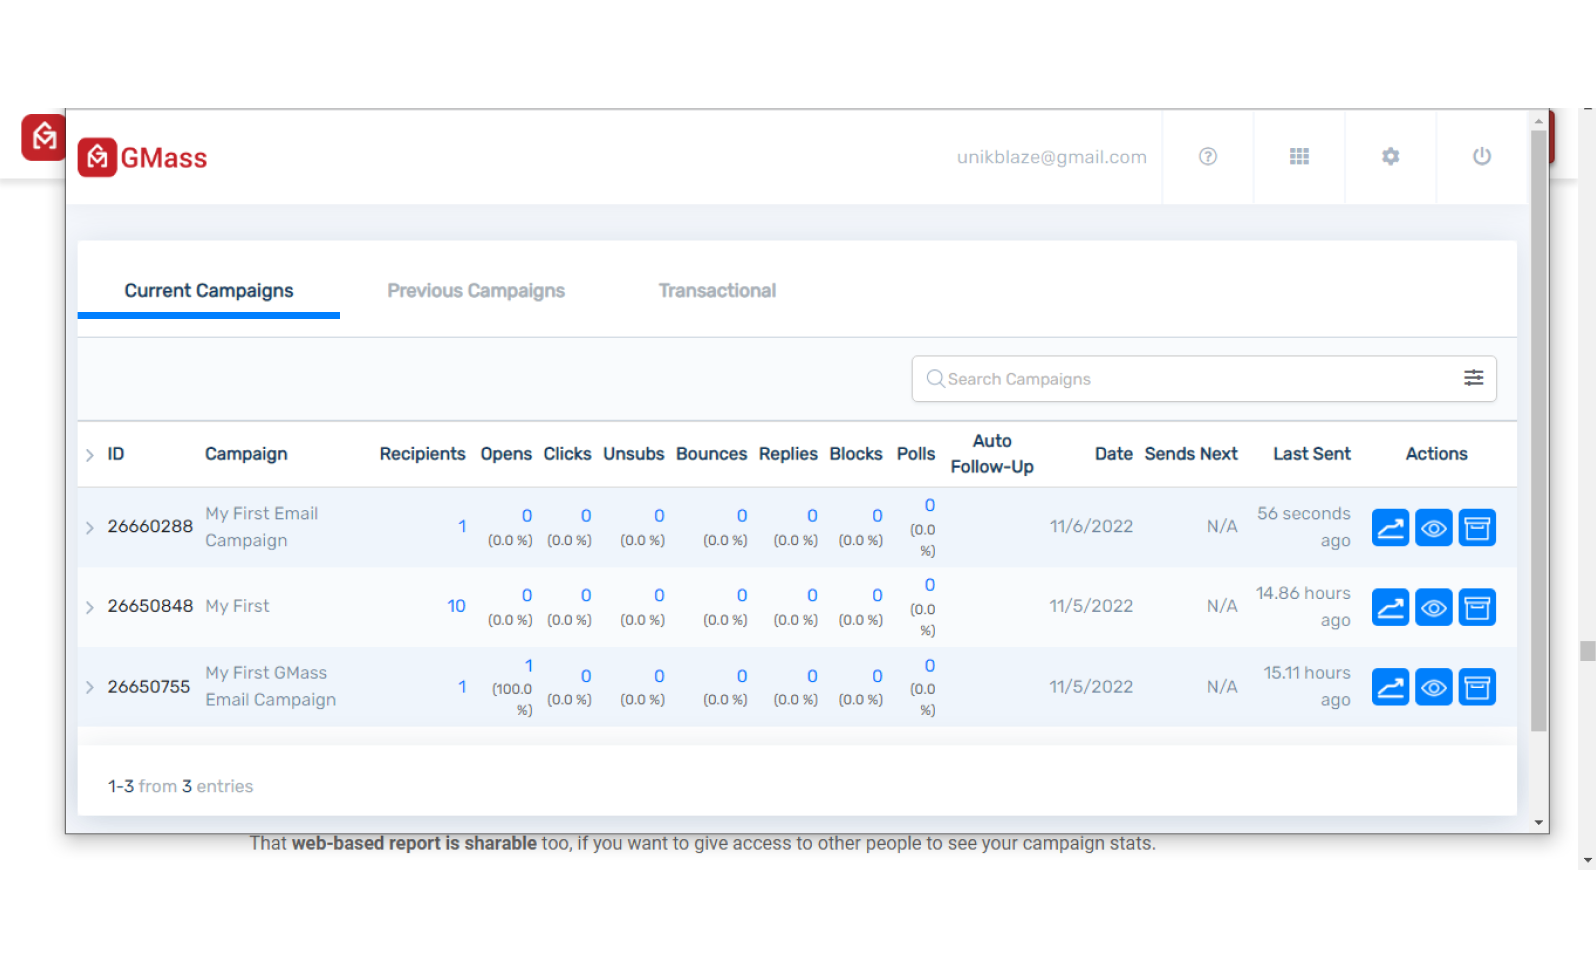
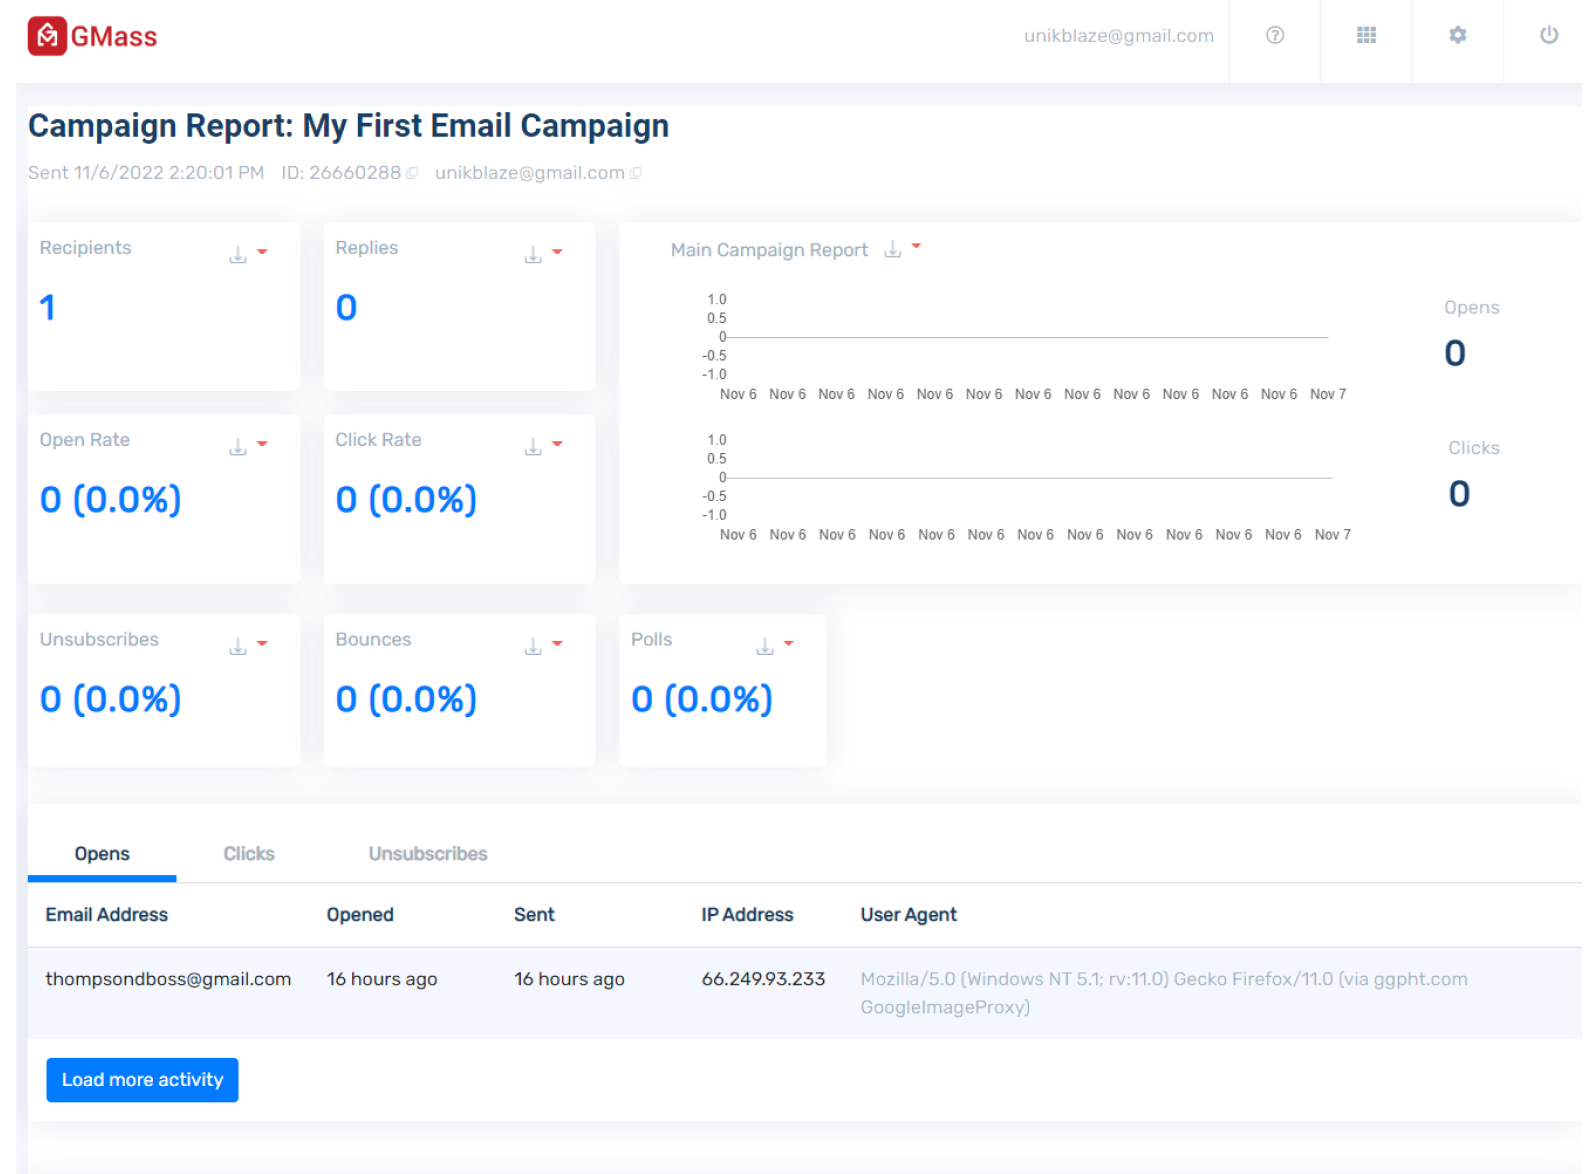
Another way to do this is to click on the chart icon to see the web-based report on your campaign statistics.
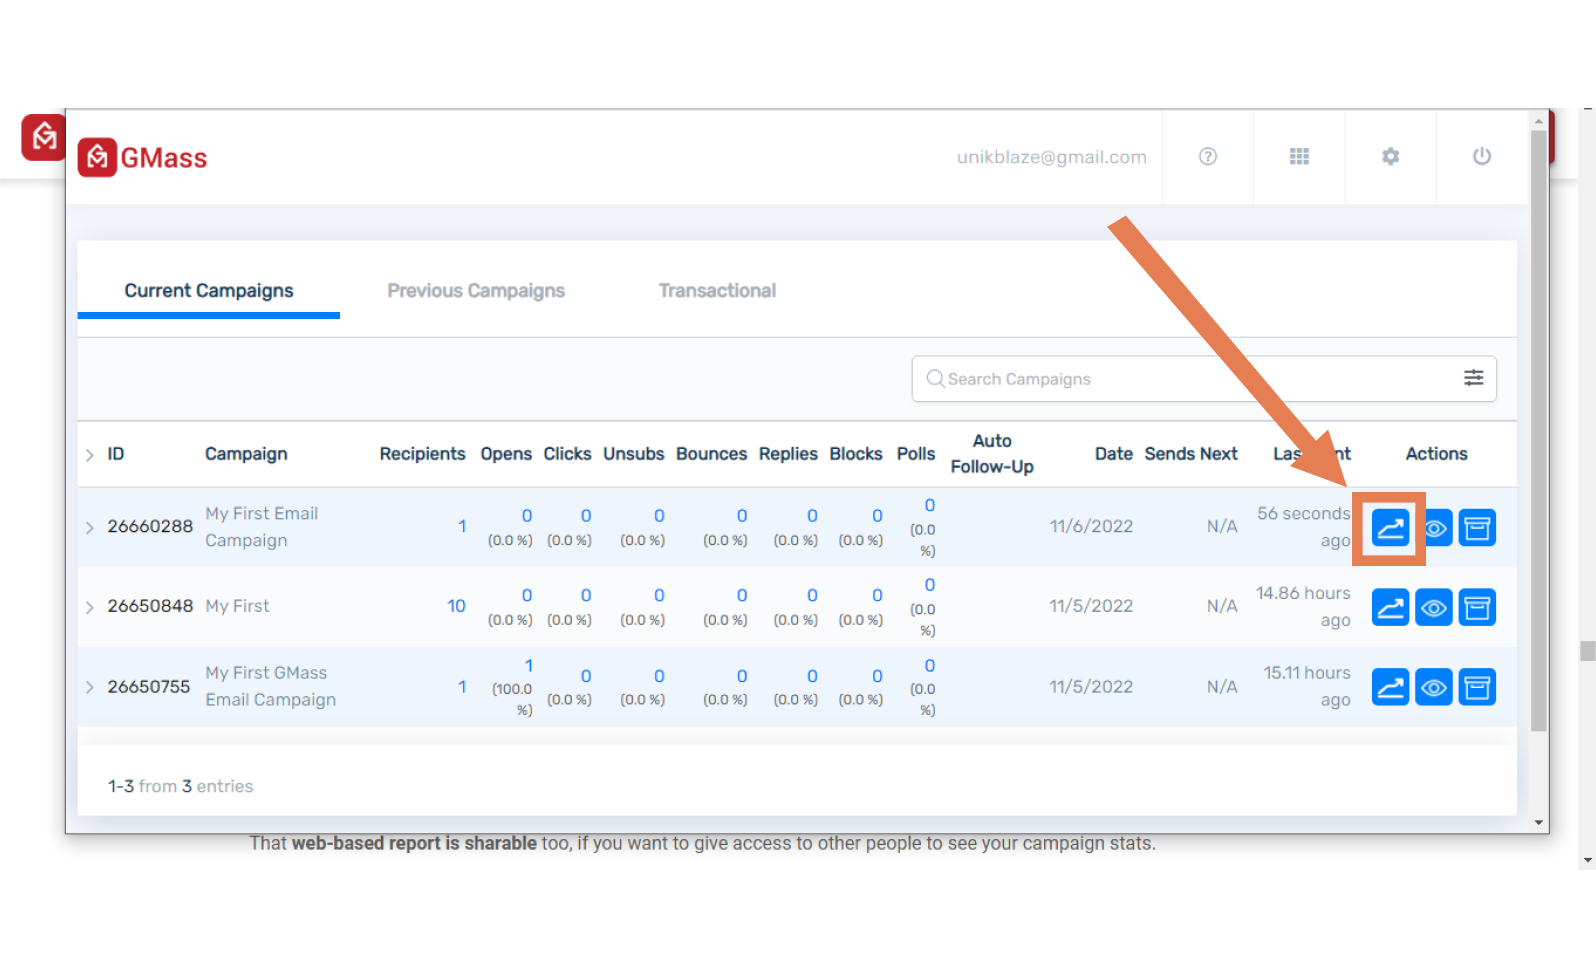
If you’d like to give other people access to your campaign stats, the web-based report is shareable.
More Features of Gmass In Gmail
Before getting into the other notable features of Gmass, it is important to warm up your email address.
Warming Up Your Email Address
You may use Gmail as a platform for mass emails by using GMass. However, the issue is, Google does not view Gmail as a platform for bulk emailing. Therefore, it's a warning sign if you suddenly switch from sending a small number of personal emails each day to sending out bulk email campaigns to dozens, hundreds, or thousands of recipients.
Your emails will most likely end up in people's spam bins rather than their inboxes, which Google won't appreciate. You can "warm up" your email address to prevent that outcome. By doing this, you'll teach Google to anticipate receiving a lot of emails from you and demonstrate to it that your recipients look forward to and want your emails.
In order to get you warmed up, GMass will send emails from your account to a variety of other random accounts. It will respond to many of those emails, classify them as not spam, and open many of them. Your warmup email volume will progressively increase thanks to GMass. Before you start sending out big campaigns, the warmer your email is, the better.
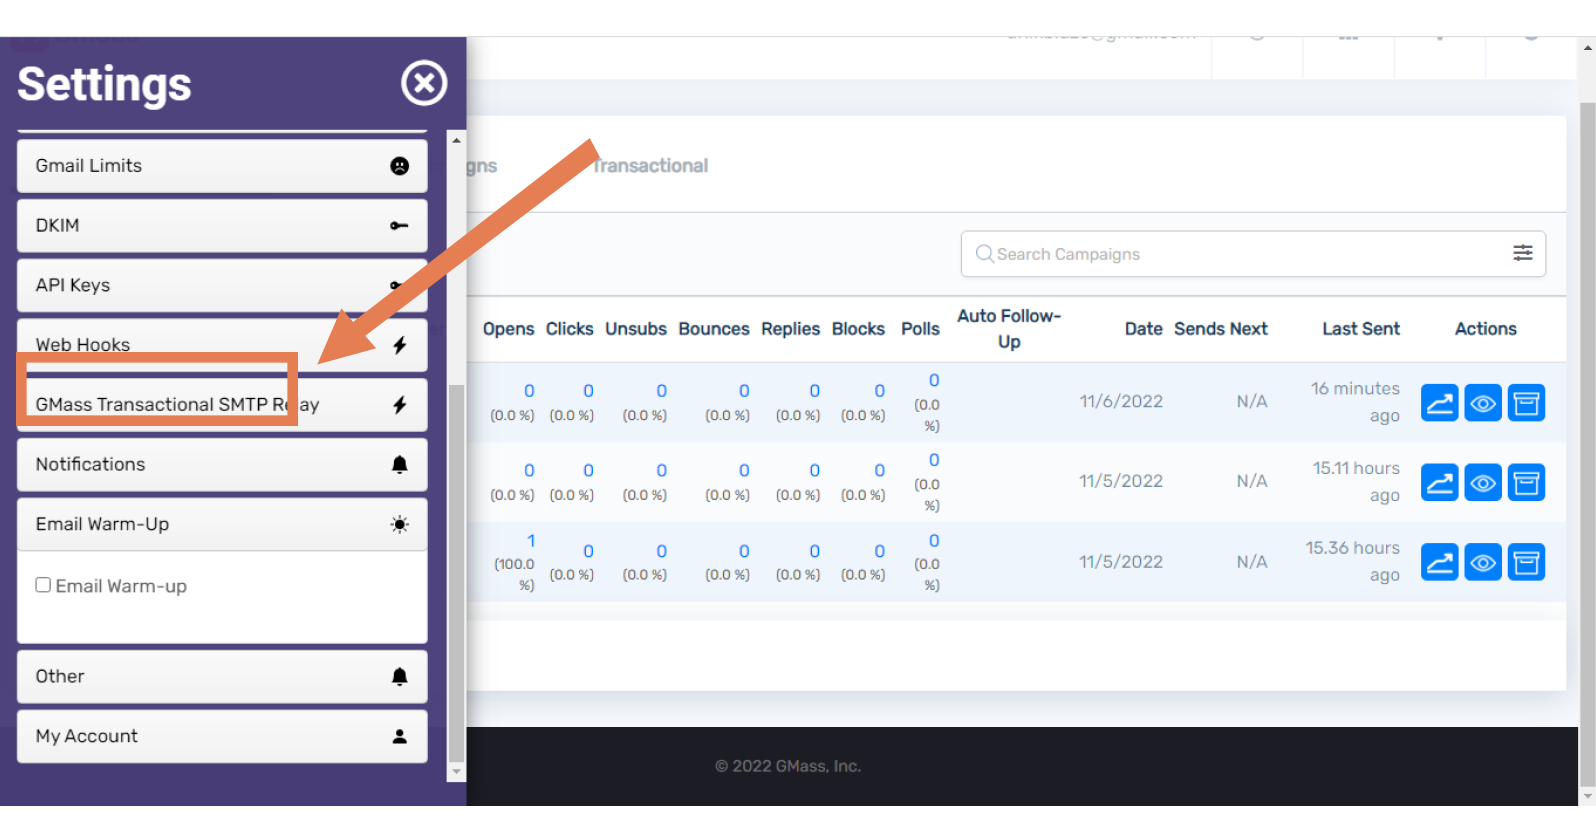
From the settings menu on the GMass dashboard, you may launch email warmup as seen below
Next, you’ll be asked to confirm if you want to warm up
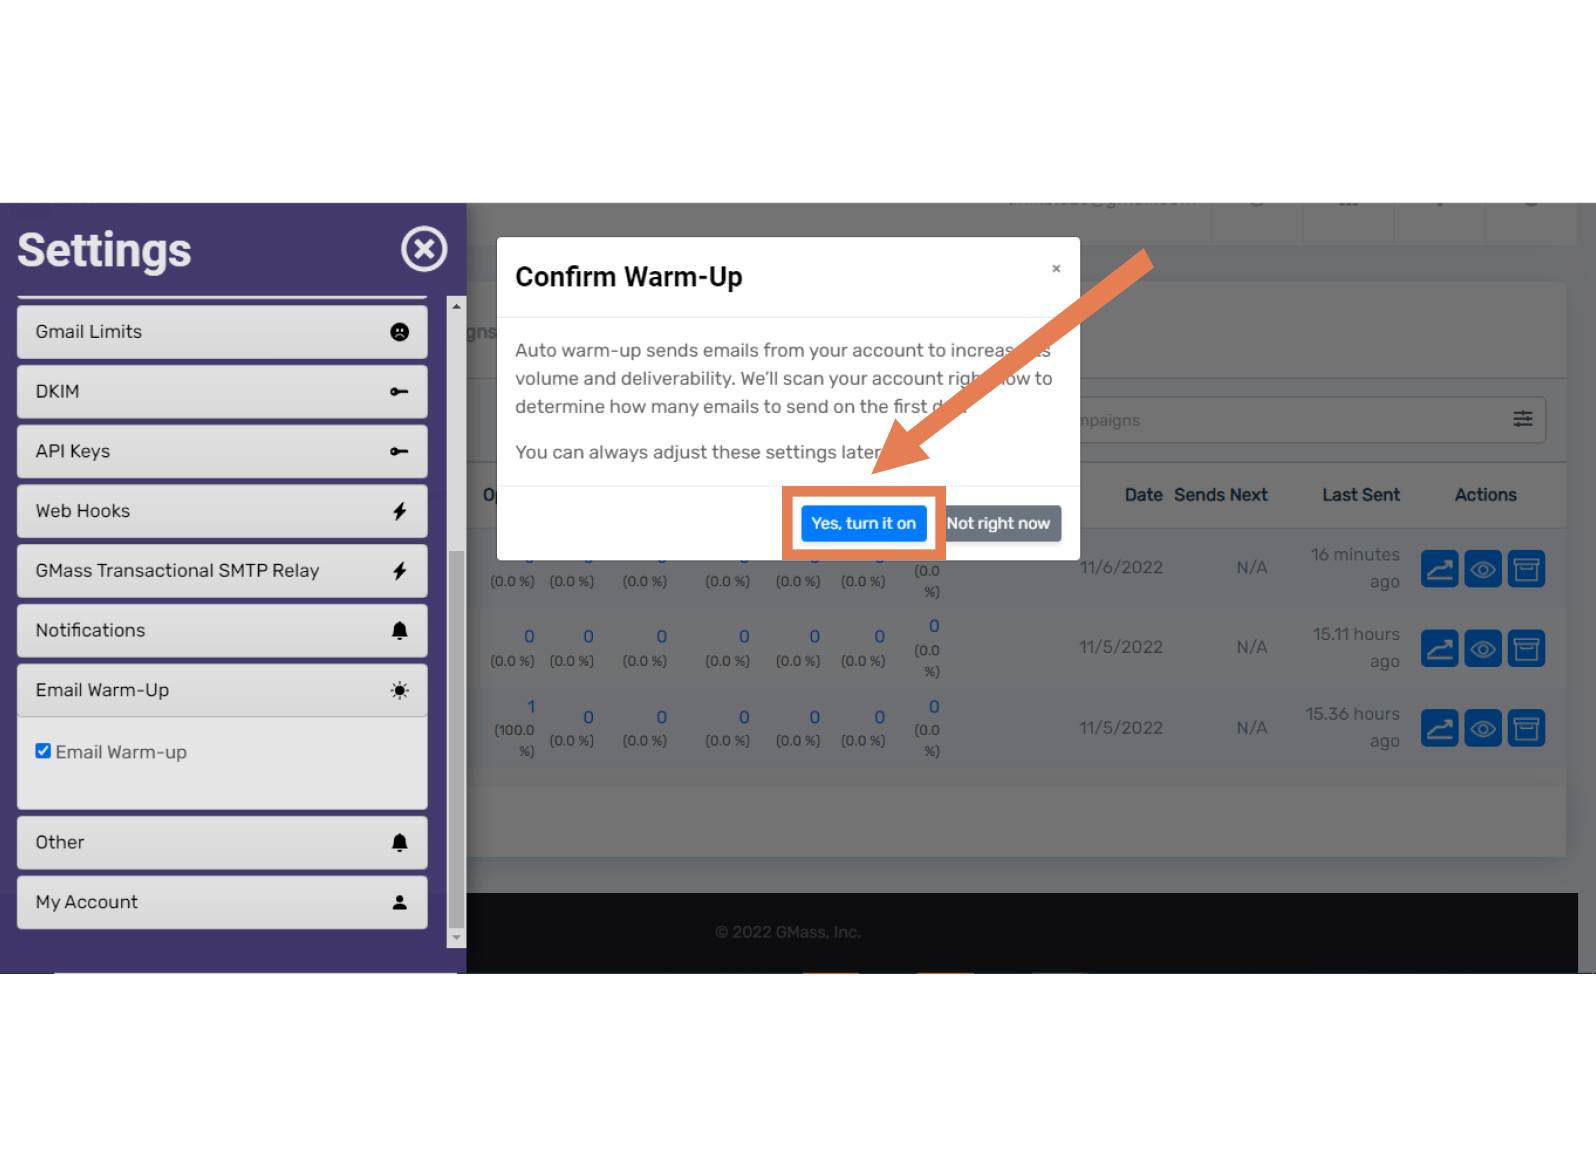
GMass will examine your account to determine your current sending volume on average. The warming tool will then have a starting point for how many emails to send each day.
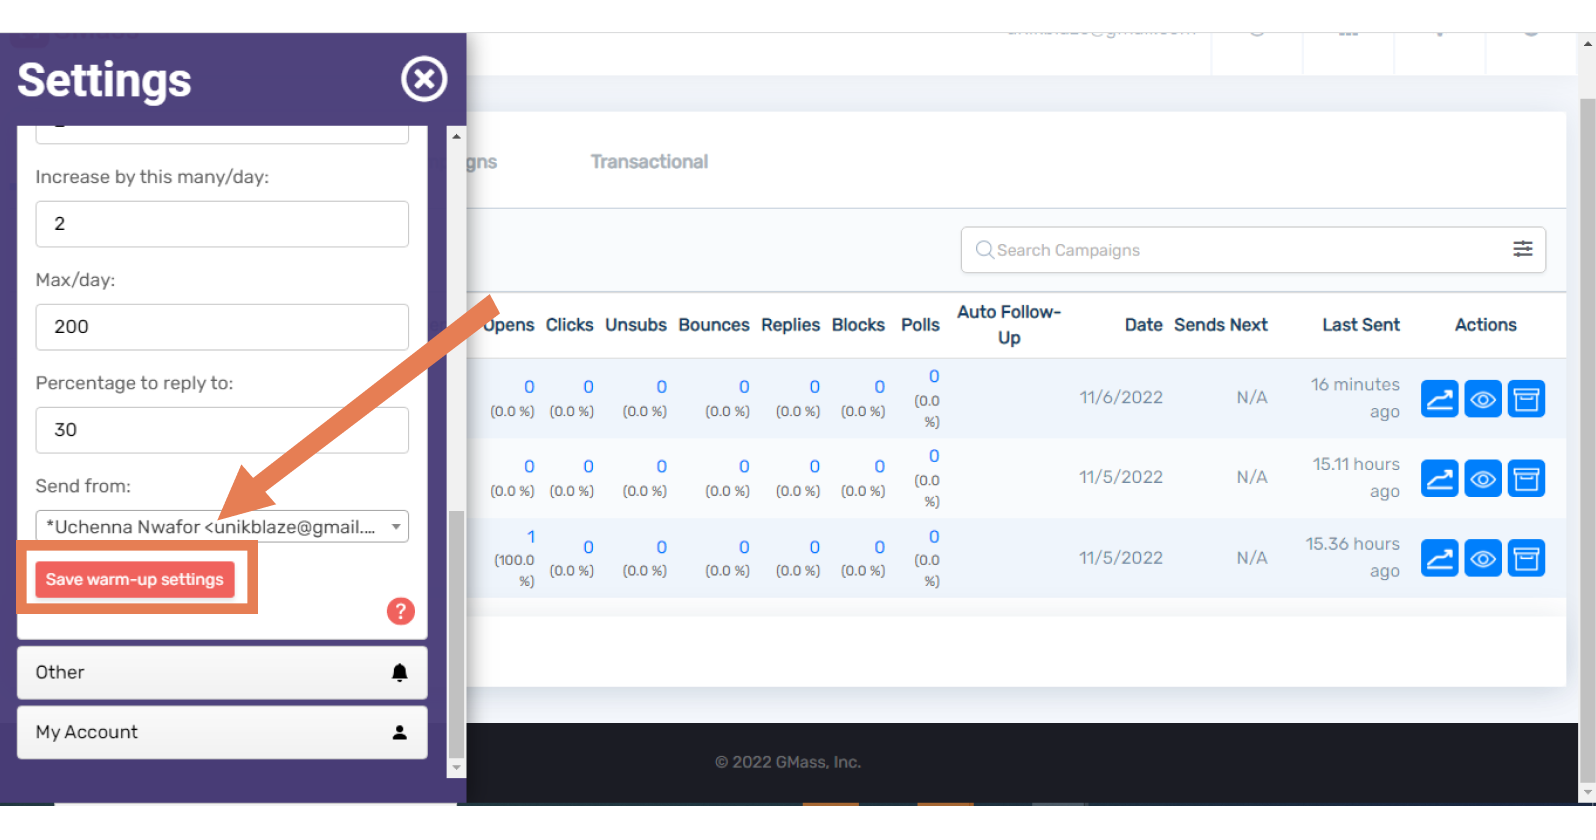
The warmup's settings can be changed. Start off slowly if you're utilizing a new email address. When you click the button, your warmup settings are saved.
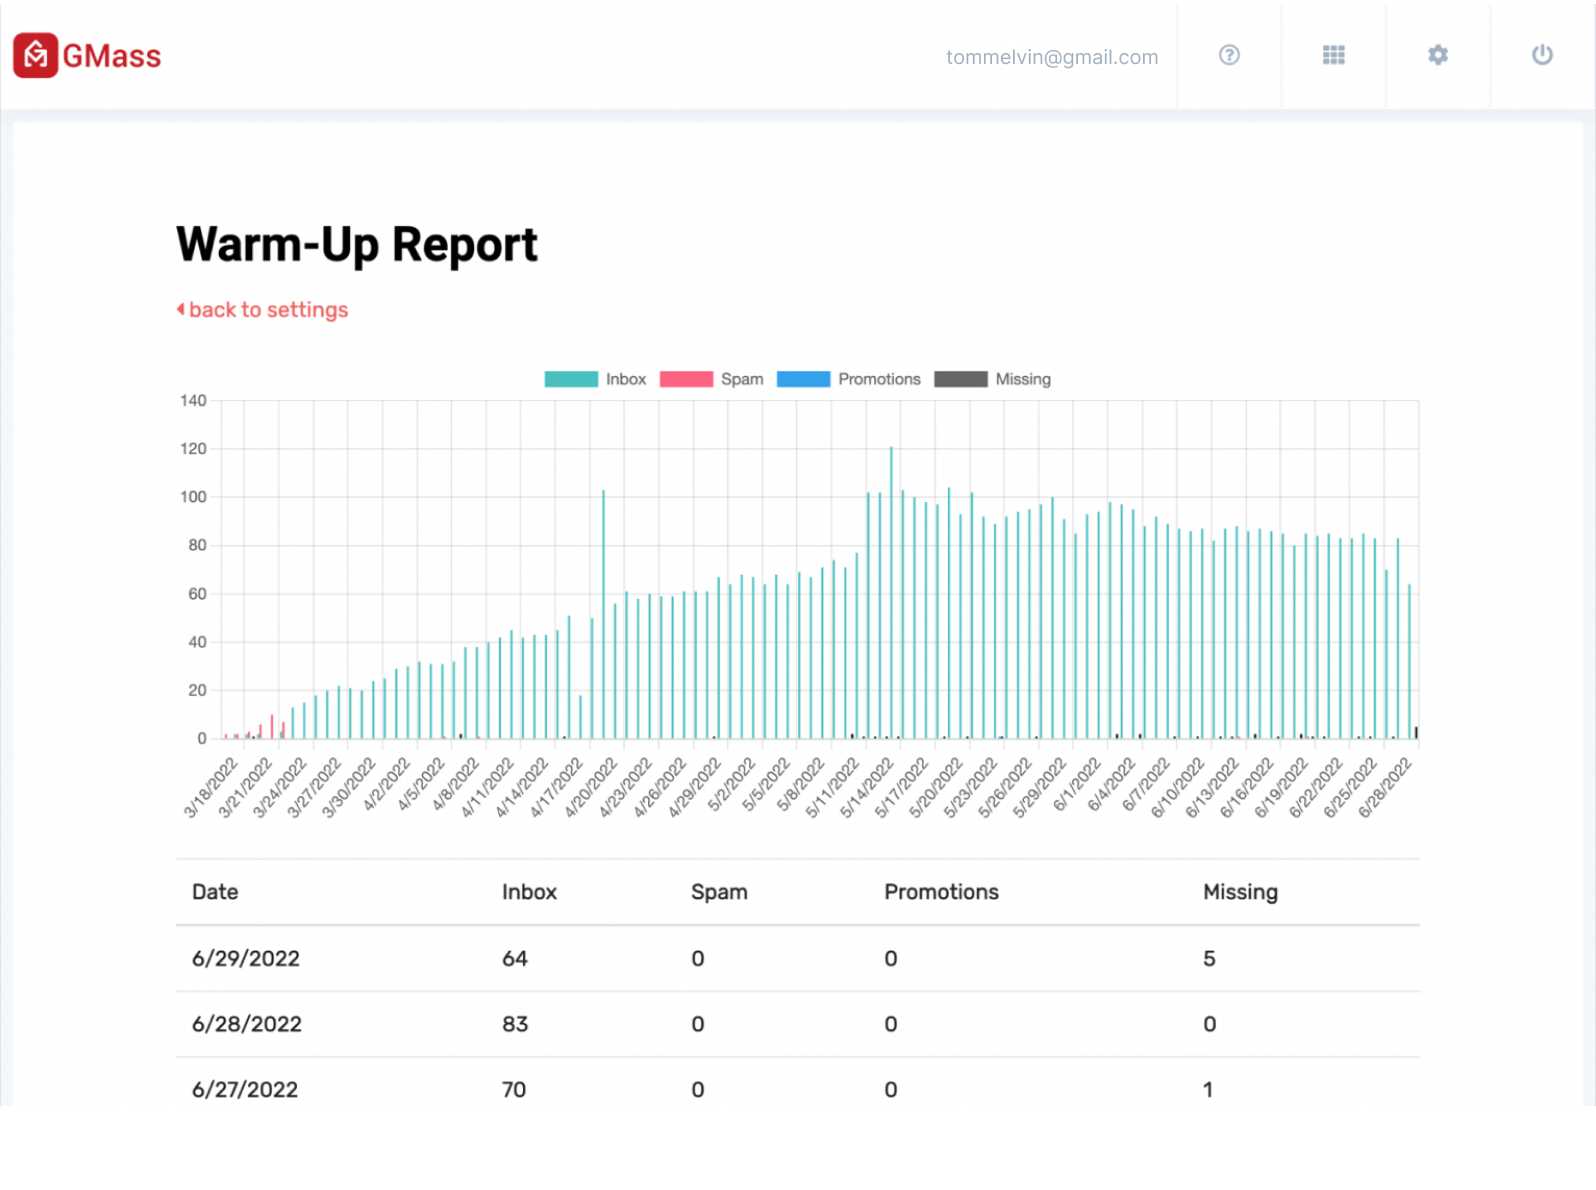
You should notice a change in the position of your inbox soon. My warmup statistics on a different email address can be seen below. As you can see, the majority of my emails at first went to spam. Soon after, thanks to the warming, I was receiving placements almost exclusively in my inbox. Now, almost none of my emails are marked as spam.
Now you can enjoy more of what Gmass has to offer which include;
- Technical Integration
- Building Mailing Lists
- Reporting
- Automation, Auto follow-ups, and Sequence
- Personalization
- Breaking Gmail’s Sending Limit
- Deliverability Tools
- List Management
- Reply Management
Concerning the aforementioned, sending emails is impossible if you have not found and extracted your contact’s email address. This is where the Spylead tool comes in handy. Spylead is the best email-finding tool for you as a recruiter, sales manager, or CEO. With this tool, you can scrap loads of results from LinkedIn, google maps, and so on.
You can now import the email addresses obtained with this tool into the google sheet, which will be connected to Gmass. The emails and data will be used for the cold outreach campaign. Some of the advantages of using Spylead are;
Background Scrape
Without opening a LinkedIn tab in the background, you may harvest emails and execute as many bulks as you like with the Spylead tool.
Scrape without boundaries
Spylead is distinct from other email searching tools that place restrictions on how many emails you can scrape each day. The use of Spylead cookie banks eliminates the possibility of restriction during scraping. This translates to the ability to scrape as many emails as you can each day.
Individual Subscription
When compared to other email-finding programs, Spylead offers greater value at a more affordable price. With Spylead, you only need to pay for one tool to fulfill all of your needs; you do not need to purchase additional memberships.
Finally…
In conclusion, installing Gmass on your Gmail is an easy process which doesn’t take time. It helps you work more effectively, and with a tool like Spylead, collating the necessary data would not be difficult.